Get started with core banking
Core banking refers to the essential systems and processes that financial institutions use to manage customer accounts and transactions. These systems handle day-to-day operations such as deposits, withdrawals, payments, loans, and account maintenance. Core banking platforms ensure that banking services are available to customers in real-time across branches and digital channels.
On the Pismo platform, you access core banking functionality through APIs that support account creation, transaction processing, ledger management, and more. You can use the Pismo platform to build a suite of products—from deposits and savings to loans and overdrafts. Refer to Banking overview for more information.
Banking with Pismo offers:
- Complete banking functionality:
- Ledgers
- Savings accounts
- Current accounts
- Deposits and overdrafts
- Spending limits and controls at the account level
- Integrations with credit card networks, anti-fraud services, card embossers, and other third-party providers
This guide outlines the essential steps for setting up a new banking customer on the Pismo platform. Using a fictional banking scenario, it presents a series of steps that illustrate the configuration workflow.
Note
Before you make API requests to the Pismo platform, make sure you’ve installed Postman and have configured all required certificates and keys. For more information, refer to Test Pismo API Endpoints with Postman.
Getting started with core banking involves these steps.
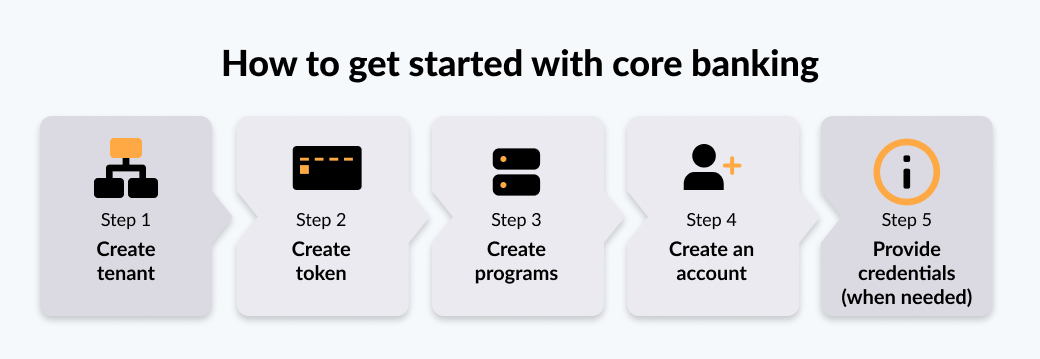
Step 1: Create your organization (tenant)
Fictional Scenario: FinBank is a financial institution that operates in Brazil. They have reached out to Pismo to support their product expansion in the local market. After connecting with a pre-sales representative and signing a work agreement, FinBank initiates the onboarding process with the Pismo platform. The Pismo support team creates their organization (org), sometimes called the tenant. An org is an object that represents an organization on the Pismo platform. For more information about org creation and all other onboarding tasks, refer to Onboarding for new customers .
Step 2: Create token
To call any Pismo API endpoint, FinBank must first generate an authentication token using its org_id. With help from their Pismo support team, they select their authentication method. For more information, refer to Onboarding for new customers.
Step 3: Create programs
FinBank decides to launch a new banking product for brand-new digital accounts on the Pismo platform. The accounts they create under this program are entirely branchless, meaning they are fully digital and operate in real-time through online channels. Refer to Create program for more information.
Step 4: Create an account
After completing the previous steps, FinBank can create the necessary accounts. They created accounts for customer A and customer B. Refer to Create account application for more information.
Step 5: Provide credentials (when needed)
Because FinBank plans to offer bill issuance, bill payment, and direct wire transfers to its customers, it enters into a service agreement with a third-party partner of Pismo to provide these capabilities. For more information on bank accounts, Pix, bill payment, bill issuance, e-Bill, and indirect wire transfers, refer to the Create provider credential guide. For more information on direct wire transfers, refer to Register for TED transfers.
Endpoints usage
For information on endpoints usage, refer to Banking overview.
Updated about 1 month ago