AWS SNS event configuration tutorial
This guide steps you through configuring AWS for Pismo real-time event delivery via SNS. You'll create two things:
- SNS Topic — Where Pismo publishes events
- IAM Role — Grants Pismo permission to publish to your topic
Prerequisites:
- An AWS account
- Your Pismo Org ID (tenant ID)
Step 1 — Create the SNS Topic
-
Log in to AWS and navigate to the SNS dashboard (search for
SNS). -
Click Topics > Create Topic.
-
Select Standard.
-
Enter a name and click Create Topic.
-
Note the ARN (Amazon Resource Name) — you'll need it for the ticket.
The following image shows the Amazon SNS dashboard.

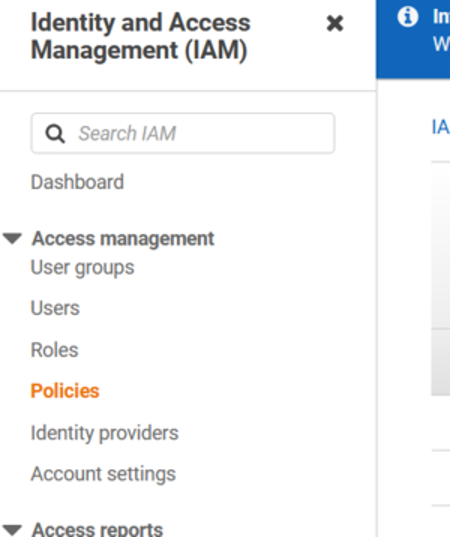
Step 2 — Create the IAM Policy
- Go to IAM > Policies > Create policy.
- Click the JSON tab and paste the following:
{
    "Version": "2012-10-17",
    "Statement": [
        {
            "Effect": "Allow",
            "Action": "sns:Publish",
            "Resource": "<YOUR_SNS_TOPIC_ARN>"
        }
    ]
}
- Click Next:Tags > Next:Review > name the policy > Create policy.
Step 3 — Create the IAM Role
- Go to IAM > Roles > Create role.
- Select AWS account > Next.
- Select the policy you just created, then select Next.
- Select Create role and name the role.
- Note the IAM Role ARN. You'll need it for the ticket.
Retry and retention policy: To ensure ecosystem stability, the platform applies retry limits. Events that exceed the retry threshold are moved to controlled retention and can be redelivered upon request, as long as they are within the 24-hour retention window.
Step 4 — Open a Service Desk Ticket
Go to: https://pismolabs.atlassian.net/servicedesk/customer/portal/10 and then do the following:
- Click Settings.
- In Category, select Data.
- In Sub-Category, select Event Integration.
- Copy the following template into the Description field, fill in your values, and submit the ticket:
INTEGRATION REQUEST — AWS SNS (Real-Time Events)
=================================================

Org ID:          TN-xxxxxxxx-xxxx-xxxx-xxxx-xxxxxxxxxxxx
Environment:     Production / Sandbox
Requester Name:  Your Name
Contact Email:   [email protected]

AWS Account ID:  123456789012
SNS Topic ARN:   arn:aws:sns:<region>:<account-id>:<topic-name>
IAM Role ARN: arn:aws:iam::<account-id>:role/<role-name>The Org ID must be lowercase (e.g., TN-a1db4e4e-315f-4a67-9036-ecacd370b561).
Important: : After Pismo completes the initial configuration, you have 24 hours to adjust permissions/access on your side. If Pismo cannot deliver events within this window, the integration will be paused and you will need to open a new ticket to resume
Need Pismo-specific details? ? Information such as Pismo's AWS Account ID, single-tenant SFTP endpoints, consumer role ARNs, or external IDs can be obtained from your Technical Account Manager (TAM) or the Implementation Engineer assigned to your project.
Step 5 — Complete the Configuration
After Pismo processes your ticket, you'll receive an external ID and Pismo's AWS account ID. Then do the following:
- Go to IAM > Roles > select your role > Trust Relationships > Edit trust policy.
- Copy and paste the following text:
{
    "Version": "2012-10-17",
    "Statement": [
        {
            "Effect": "Allow",
            "Principal": {
                "AWS": "arn:aws:iam::<PISMO_AWS_ACCOUNT_ID>:role/dataplatform-lambda-fn-<YOUR_ORG_ID>"
            },
            "Action": "sts:AssumeRole",
            "Condition": {
                "StringEquals": {
                    "sts:ExternalId": "<PISMO_PROVIDED_EXTERNAL_ID>"
                }
}- Click Update policy. Events will now start flowing to your SNS topic.
CLI Alternative — All Steps via AWS CLI
Follow these steps if you prefer the command line over the AWS Console:
# Variables — replace with your values
TOPIC_NAME="pismo-events"
POLICY_NAME="pismo-sns-publish"
ROLE_NAME="pismo-event-role"
REGION="us-east-1"
ACCOUNT_ID=$(aws sts get-caller-identity --query Account --output text)

# Step 1 — Create the SNS Topic
aws sns create-topic --name "$TOPIC_NAME" --region "$REGION"
# Note the TopicArn from the output

TOPIC_ARN="arn:aws:sns:${REGION}:${ACCOUNT_ID}:${TOPIC_NAME}"

# Step 2 — Create the IAM Policy
cat > /tmp/pismo-sns-policy.json <<EOF
{
    "Version": "2012-10-17",
    "Statement": [
        {
            "Effect": "Allow",
            "Action": "sns:Publish",
            "Resource": "$TOPIC_ARN"
        }
    ]
}
EOF

aws iam create-policy \
    --policy-name "$POLICY_NAME" \
    --policy-document file:///tmp/pismo-sns-policy.json

POLICY_ARN="arn:aws:iam::${ACCOUNT_ID}:policy/${POLICY_NAME}"

# Step 3 — Create the IAM Role
cat > /tmp/pismo-trust-policy.json <<EOF
{
    "Version": "2012-10-17",
    "Statement": [
        {
            "Effect": "Allow",
            "Principal": { "AWS": "${ACCOUNT_ID}" },
            "Action": "sts:AssumeRole"
        }
    ]
}
EOF

aws iam create-role \
    --role-name "$ROLE_NAME" \
    --assume-role-policy-document file:///tmp/pismo-trust-policy.json

aws iam attach-role-policy \
    --role-name "$ROLE_NAME" \
    --policy-arn "$POLICY_ARN"

ROLE_ARN="arn:aws:iam::${ACCOUNT_ID}:role/${ROLE_NAME}"

echo "SNS Topic ARN:  $TOPIC_ARN"
echo "IAM Role ARN:   $ROLE_ARN"
echo "AWS Account ID: $ACCOUNT_ID"
Step 5 — Update trust policy (after receiving Pismo's external ID):
PISMO_ACCOUNT_ID="<from-pismo>"
ORG_ID="<your-org-id>"
EXTERNAL_ID="<from-pismo>"

cat > /tmp/pismo-trust-final.json <<EOF
{
    "Version": "2012-10-17",
    "Statement": [
        {
            "Effect": "Allow",
            "Principal": {
                "AWS": "arn:aws:iam::${PISMO_ACCOUNT_ID}:role/dataplatform-lambda-fn-${ORG_ID}"
            },
            "Action": "sts:AssumeRole",
            "Condition": {
                "StringEquals": {
                    "sts:ExternalId": "${EXTERNAL_ID}"
                }
            }
        }
    ]
}
EOF

aws iam update-assume-role-policy \
    --role-name "$ROLE_NAME" \
    --policy-document file:///tmp/pismo-trust-final.json

echo "Trust policy updated."
Validate Integration
Run the following script to validate your integration. It checks all configuration steps and provides troubleshooting guidance:
Diagnostic Script
#!/bin/bash
# ============================================================
#  AWS SNS Troubleshooting — Pismo Data Platform
# ============================================================
TOPIC_ARN="arn:aws:sns:us-east-1:123456789012:pismo-events"  # ← replace
ROLE_NAME="pismo-event-role"                                  # ← replace
REGION="us-east-1"                                            # ← replace
PISMO_ACCOUNT_ID=""                                           # ← from Pismo
ORG_ID=""                                                     # ← your org ID
PASS=0; FAIL=0

echo "============================================================"
echo "  AWS SNS Integration Diagnostics"
echo "============================================================"

# 1. AWS CLI configured?
echo "[1/6] Checking AWS CLI..."
if aws sts get-caller-identity >/dev/null 2>&1; then
    ACCT=$(aws sts get-caller-identity --query Account --output text)
    echo "  ✅ PASS — Logged in as account $ACCT"
    PASS=$((PASS+1))
else
    echo "  ❌ FAIL — AWS CLI not configured or not authenticated"
    echo "  → Run: aws configure"
    FAIL=$((FAIL+1))
fi

# 2. Topic exists?
echo "[2/6] Checking SNS topic..."
if aws sns get-topic-attributes --topic-arn "$TOPIC_ARN" --region "$REGION" >/dev/null 2>&1; then
    echo "  ✅ PASS — Topic exists"
    PASS=$((PASS+1))
else
    echo "  ❌ FAIL — Topic not found: $TOPIC_ARN"
    echo "  → Verify region and ARN"
    FAIL=$((FAIL+1))
fi

# 3. IAM Role exists?
echo "[3/6] Checking IAM role..."
if aws iam get-role --role-name "$ROLE_NAME" >/dev/null 2>&1; then
    echo "  ✅ PASS — Role exists"
    PASS=$((PASS+1))
else
    echo "  ❌ FAIL — Role not found: $ROLE_NAME"
    FAIL=$((FAIL+1))
fi

# 4. Trust policy references Pismo?
echo "[4/6] Checking trust policy..."
TRUST=$(aws iam get-role --role-name "$ROLE_NAME" \
    --query 'Role.AssumeRolePolicyDocument' --output json 2>/dev/null)
if echo "$TRUST" | grep -q "dataplatform-lambda-fn"; then
    echo "  ✅ PASS — Trust policy references Pismo lambda"
    PASS=$((PASS+1))
elif echo "$TRUST" | grep -q "$PISMO_ACCOUNT_ID"; then
    echo "  ⚠️  WARN — Trust policy references Pismo account but not the lambda role"
    echo "  → Update trust policy per Step 5"
    FAIL=$((FAIL+1))
else
    echo "  ❌ FAIL — Trust policy does NOT reference Pismo"
    echo "  → Update trust policy per Step 5"
    FAIL=$((FAIL+1))
fi

# 5. Role has sns:Publish permission?
echo "[5/6] Checking attached policies..."
POLICIES=$(aws iam list-attached-role-policies --role-name "$ROLE_NAME" \
    --query 'AttachedPolicies[].PolicyArn' --output text 2>/dev/null)
if [ -n "$POLICIES" ]; then
    echo "  ✅ PASS — Policies attached: $POLICIES"
    PASS=$((PASS+1))
else
    echo "  ❌ FAIL — No policies attached to role"
    echo "  → Attach the sns:Publish policy"
    FAIL=$((FAIL+1))
fi

# 6. Test publish?
echo "[6/6] Test-publishing to topic..."
MSG_ID=$(aws sns publish --topic-arn "$TOPIC_ARN" --region "$REGION" \
    --message '{"diagnostic": "pismo-troubleshoot"}' \
    --query 'MessageId' --output text 2>/dev/null)
if [ -n "$MSG_ID" ]; then
    echo "  ✅ PASS — Published test message: $MSG_ID"
    PASS=$((PASS+1))
else
    echo "  ❌ FAIL — Could not publish to topic"
    echo "  → Check topic permissions and region"
    FAIL=$((FAIL+1))
fi

# Save diagnostic output to log file
LOG_FILE="/tmp/pismo-diagnostic-$(date +%Y%m%d-%H%M%S).log"

# Capture everything to log file
{
    echo "=================================================================="
    echo "  PISMO DATA PLATFORM — DIAGNOSTIC LOG"
    echo "=================================================================="
    echo ""
    echo "Timestamp: $(date -u '+%Y-%m-%d %H:%M:%S UTC')"
    echo "Integration Type: AWS SNS Real-Time Events"
    echo ""
    echo "=== CONFIGURATION ==="
    echo "Org ID: $ORG_ID"
    echo "Topic ARN: $TOPIC_ARN"
    echo "IAM Role: $ROLE_NAME"
    echo "Region: $REGION"
    echo "AWS Account: $(aws sts get-caller-identity --query Account --output text 2>/dev/null || echo 'N/A')"
    echo ""
    echo "=== TEST RESULTS ==="
    echo "Passed: $PASS"
    echo "Failed: $FAIL"
    echo ""
    echo "=== TRUST POLICY ==="
    aws iam get-role --role-name "$ROLE_NAME" --query 'Role.AssumeRolePolicyDocument' --output json 2>/dev/null || echo "Could not retrieve"
    echo ""
    echo "=== ATTACHED POLICIES ==="
    aws iam list-attached-role-policies --role-name "$ROLE_NAME" --output json 2>/dev/null || echo "Could not retrieve"
} > "$LOG_FILE" 2>&1

# Display results summary
echo ""
echo "============================================================"
echo "  RESULTS: $PASS passed, $FAIL failed"
echo "============================================================"

if [ $FAIL -eq 0 ]; then
    echo ""
    echo "  ✅ All checks passed — your infrastructure is correctly configured."
    echo ""
    echo "  If events are still not arriving, there may be a potential issue in:"
    echo "    • Event Publisher component (cross-account role assumption)"
    echo "    • Event Router configuration (org/destination mapping)"
    echo "    • Event generation (no events for your org in the selected period)"
    echo ""
else
    echo ""
    echo "  ❌ Some checks failed — review the errors above."
    echo ""
    echo "  These failures indicate configuration issues in your infrastructure."
    echo "  Follow the suggested fixes (→) for each failed check."
    echo "  After fixing, run this script again to verify."
    echo ""
fi

echo "============================================================"
echo "  📋 SUPPORT TICKET INSTRUCTIONS"
echo "============================================================"
echo ""
echo "  Diagnostic log saved to: $LOG_FILE"
echo ""
echo "  To open a support ticket:"
echo "  ┌─────────────────────────────────────────────────────────┐"
echo "  │  1. Portal: https://pismolabs.atlassian.net/servicedesk │"
echo "  │     /customer/portal/10                                 │"
echo "  │  2. Category: Settings → Data → Event Integration"
echo "  │  3. Attach the log file OR paste its content below      │"
echo "  └─────────────────────────────────────────────────────────┘"
echo ""
echo "  Copy to clipboard (macOS):  cat $LOG_FILE | pbcopy"
echo "  Copy to clipboard (Linux):  cat $LOG_FILE | xclip -selection clipboard"
echo ""
echo "  ────────────── LOG FILE CONTENT ──────────────"
echo ""
cat "$LOG_FILE"
echo ""
echo "  ──────────────────────────────────────────────"
echo ""```
Updated 14 days ago