AWS event file configuration tutorial
Configuring Amazon Web Services (AWS) for Pismo event file notification deliver requires you to create two things in AWS:
-
Identity and Access Management policy: You manage access in AWS by creating policies and attaching them to IAM identities (users, groups of users, or roles) or AWS resources.
-
IAM role: An IAM role is an IAM identity that you can create in your account that has specific permissions.
Prior to doing this, you should have already set up real-time event delivery. You must be able to receive Pismo event notifications in real-time to know when a new event file is available for download.
AWS UI configuration
For this tutorial, you need:
- An AWS account.
- Your Pismo organization ID.
- Your AWS S3 bucket name. For example,
pismo-dataplatform-<org_ID>. - AWS data account ID (from Pismo).
Create IAM policy
-
Go to the Amazon Web Services website and log in to your AWS account.
-
Go to the IAM dashboard.
-
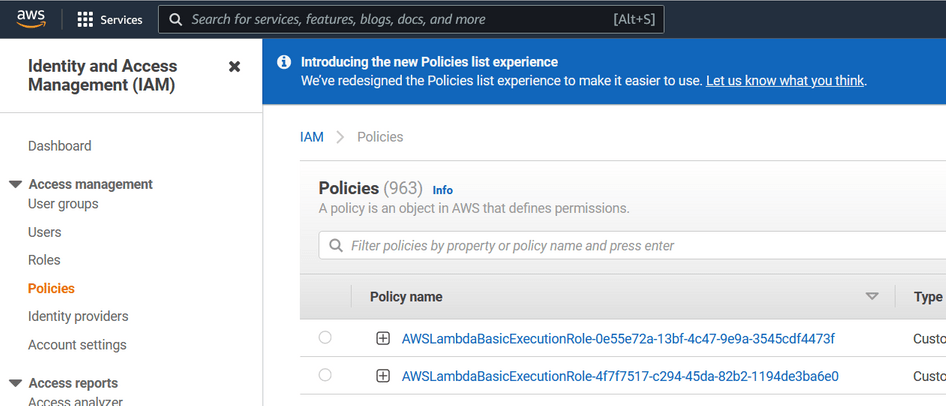
In the navigation menu, under Access Management, select Policies.

-
Select Create policy in the upper-right.
-
Select the JSON tab and enter the following:
{
    "Version": "2012-10-17",
    "Statement": [
        {
            "Effect": "Allow",
            "Action": [
                "sts:AssumeRole"
            ],
            "Resource": [
                "arn:aws:iam::<Pismo_AWS_account_ID>:role/dataplatform-consumer-<org_ID>"
            ]
        }
    ]
}
The
org_IDyou enter here must have lowercase letters.
- Select Next:Tags and Next:Review and give the policy a Name. Then, select Create policy.
Create IAM role
-
Return to the IAM dashboard and select Access Management > Roles.
-
Select Create role.
-
On the Select trusted entity page that appears, select AWS account and, then, Next.
-
Select the checkbox of your previously created policy and then, Next.
-
Enter a role name and select Create role.
-
Select View role and get the role's arn (Amazon resource name).
For example, arn:aws:iam::303421646629:role/NewRole
Create service desk ticket
-
Go to Pismo's service desk.
-
Select request type Settings/Configuration.
-
Fill out subject and description entries similar to this:
Subject
Add configuration to file integration of organization (your org_ID> to AWS account for <test , prod> environment.Description
Add configuration to the integration of to AWS account in <prod, dev> environment.
My AWS account is:
My role arn is: < your_IAM_role_ARN>
In resoponse, Pismo creates an S3 bucket to handle file transfers exclusively for your organization. Pismo also creates an IAM role. Your routine must assume this IAM role before accessing the S3 Bucket to retrieve files. Initially, no resource has permission to execute AssumeRole. Permission for this action can be set after you let Pismo know your IAM role.
Test your AWS integration
For this integration you need:
-
Linux computer.
-
AWS CLI configured with your client IAM role.
-
Your AWS S3 bucket name. For example,
pismo-dataplatform-<org_ID> -
Pismo's IAM role ARN . For example:
arn:aws:iam::<AWS_data_account ID>:role/dataplatform-consumer-<org_ID>) -
Your client role IAM ARN
-
AWS configuration shell script provided below.
Run the following AWS configuration shell script in a terminal (you can copy and paste the code block) and then enter the relevant values when prompted.
validate-s3-integration.sh
#!/bin/bash

# Read the user input

echo "Enter the s3 bucket name $bucket (The bucket name should look like pismo-dataplatform-Tenant/Org ID): "
read bucket
echo "The Client role arn $role_client: "
read role_client
echo "Enter Pismo role arn $role_pismo (The Pismo role ARN should look like arn:aws:iam::AWS data account ID:role/dataplatform-consumer-Tenant/Org ID): "
read role_pismo

read -p "Do you want to continue running the script  (y/n)?" select
case "$select" in
  y|Y ) echo "yes";;
  n|N ) echo "no";;
  * ) echo "invalid";;
esac

#Step 1 : To assume a role for client
echo "[1/3] Assuming the local IAM Role"
eval "export $(aws sts assume-role \
 --role-arn $role_client \
 --role-session-name=test \
 --output text \
 --query='Credentials.[
        join(`=`, [`AWS_ACCESS_KEY_ID`, AccessKeyId]),
        join(`=`, [`AWS_SECRET_ACCESS_KEY`, SecretAccessKey]),
        join(`=`, [`AWS_SESSION_TOKEN`, SessionToken])
    ]')"

#Step 2 : To assume a role for pismo (as target)
echo "[2/3] Assuming the Pismo IAM Role"
eval "export $(aws sts assume-role \
 --role-arn $role_pismo \
 --role-session-name=test \
 --output text \
 --query='Credentials.[
        join(`=`, [`AWS_ACCESS_KEY_ID`, AccessKeyId]),
        join(`=`, [`AWS_SECRET_ACCESS_KEY`, SecretAccessKey]),
        join(`=`, [`AWS_SESSION_TOKEN`, SessionToken])
    ]')"

#Step 3 : List the S3 bucket objects
echo "[3/3] Trying to list the Pismo S3 bucket"
echo "Below are the S3 object listed: "
aws s3 ls s3://$bucket
Listing the S3 object confirms a successful integration, as shown in the following image.

Updated 12 months ago