GCP event configuration tutorial
This article steps you through configuring Google Cloud Platform (GCP) for event notification delivery. This requires you to create three things in GCP:
-
Google Cloud project ; A project "is a set of configuration settings that define how your app interacts with Google services and what resources it uses."
-
GCP Pub/Sub Topic – A Pub/Sub resource name uniquely identifies a Pub/Sub resource, such as a subscription or topic."
-
Identity and Access Management (IAM) role – An IAM role contains "a set of permissions that allows you to perform specific actions on Google Cloud resources. To make permissions available to principals, including users, groups, and service accounts, you grant roles to the principals".
For this tutorial, you need:
- A Google Cloud account
Configure GCP for Pismo event notifications
-
Go to the Google Cloud website and log in to your Google account.
-
Navigate to the GCP Console.
Select or create a project:
- Select the project dropdown menu to the left of the search field.

-
Select an existing project, or click New Project to create a new one. If you select an existing project, skip the next two steps.
-
Enter a project name and click Create.
-
Select the project you just created from the Notifications menu or from the projects dropdown menu.
Create a topic:
-
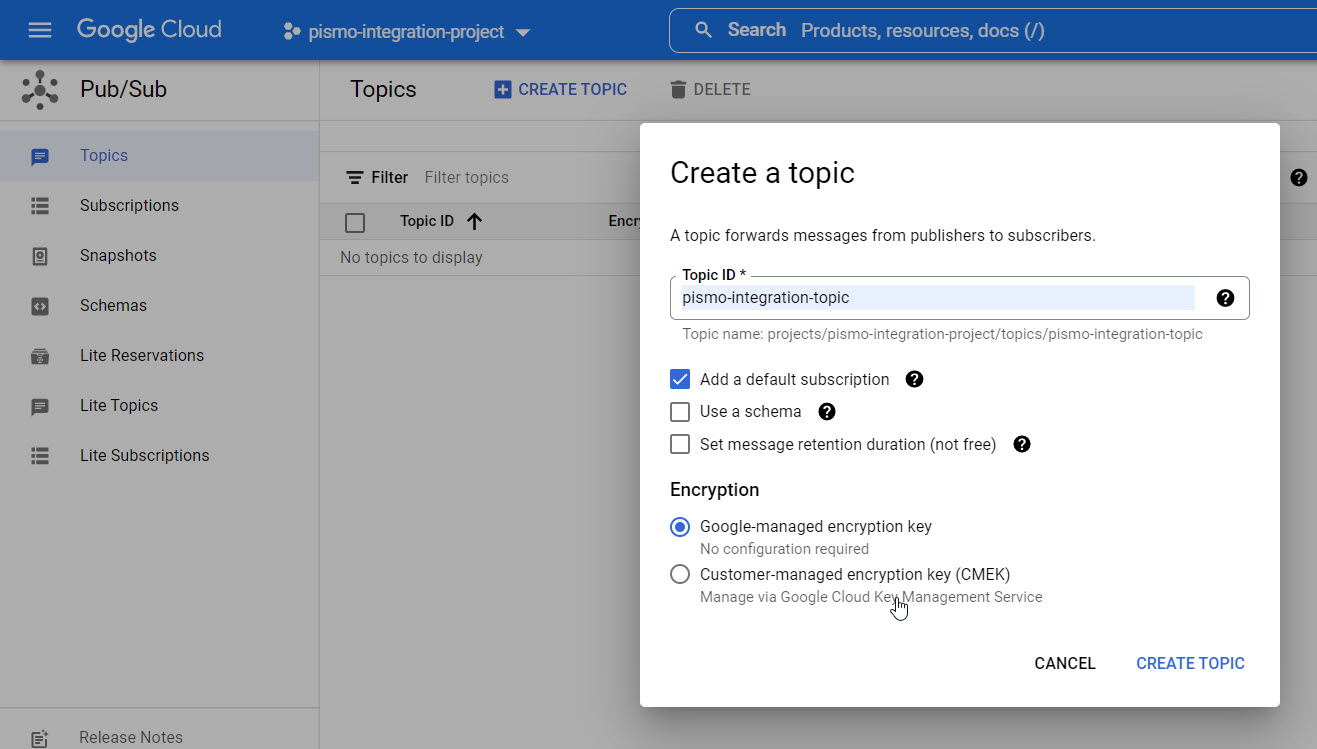
Enter "topics" in the search field and press Enter to bring up the Topics page.
-
Click +Create a topic.
-
Enter a Name for the topic and click Create Topic.

To give Pismo access to your Pub/Sub Topic:
-
After your Pub/Sub Topic is created, the following information must be sent back to Pismo:
- The GCP Project ID
- The GCP Pub/Sub Topic Name
Pismo will create the necessary resources and give you a GCP IAM Service Account ID that you can use for uploading to your GCP Pub/Sub Topic.
-
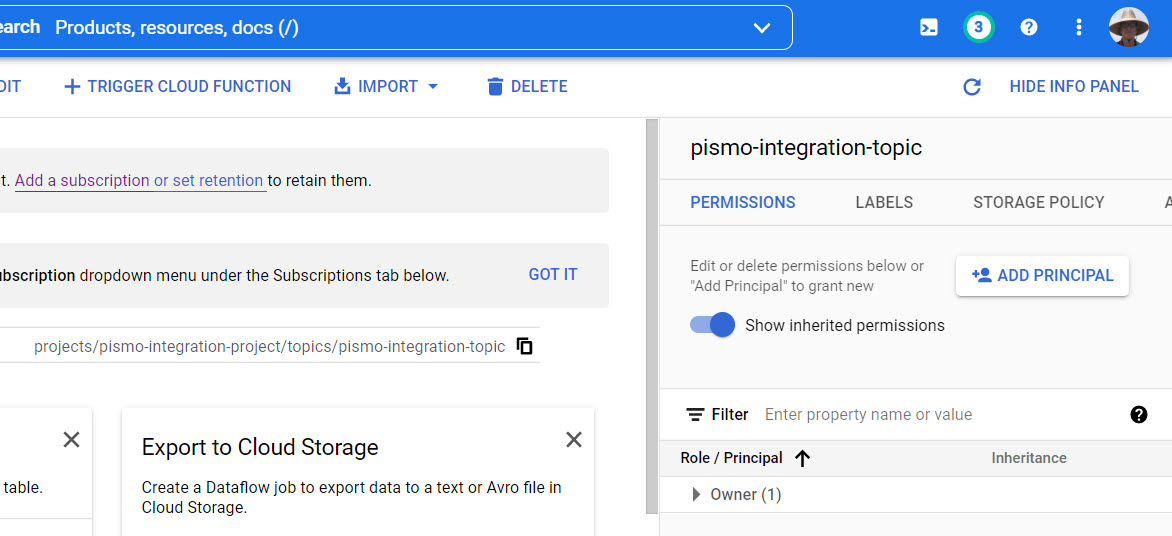
Navigate to the GCP Pub/Sub Topic that you just created.
-
Select the Permissions tab, then select the +Add Principal button.

-
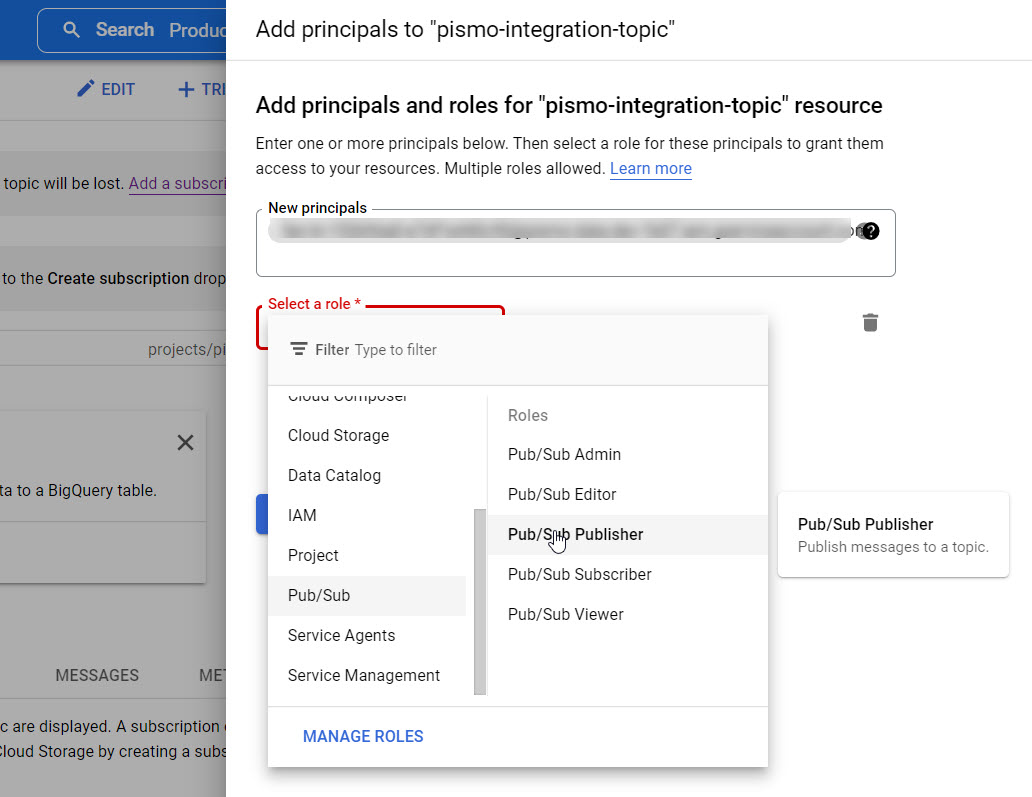
Enter the GCP IAM Service Account ID in the New principals field.
-
Select Pub/Sub > Pub/Sub Publisher from the Select a role dropdown menu.

- Click Save.
Updated almost 2 years ago