Manage Open ID configurations
You can use Pismo Control Center to add and manage OpenID authentication configurations for an Org.
Your Control Center user account must have the Admin role to use this feature.
Create OpenID authentication configuration
To add an OpenID authentication configuration to an Org, you must do the following:
- Provide a public encryption key for use when authenticating with the Pismo platform.
- Specify one of the following authentication types:
- Standard: Gives the organization access to all Pismo endpoints that the customer has access to. It is managed internally by the Pismo platform.
- Third-party: Gives access to selected Pismo endpoints, based on OIDC permission groups. This method is typically managed for you by a third-party provider.
The third-party authentication type is not available in the current release.
For more information about using OpenID Connect for authentication with the Pismo platform, see Authentication with OpenID Connect.
To create an OpenID authentication configuration:
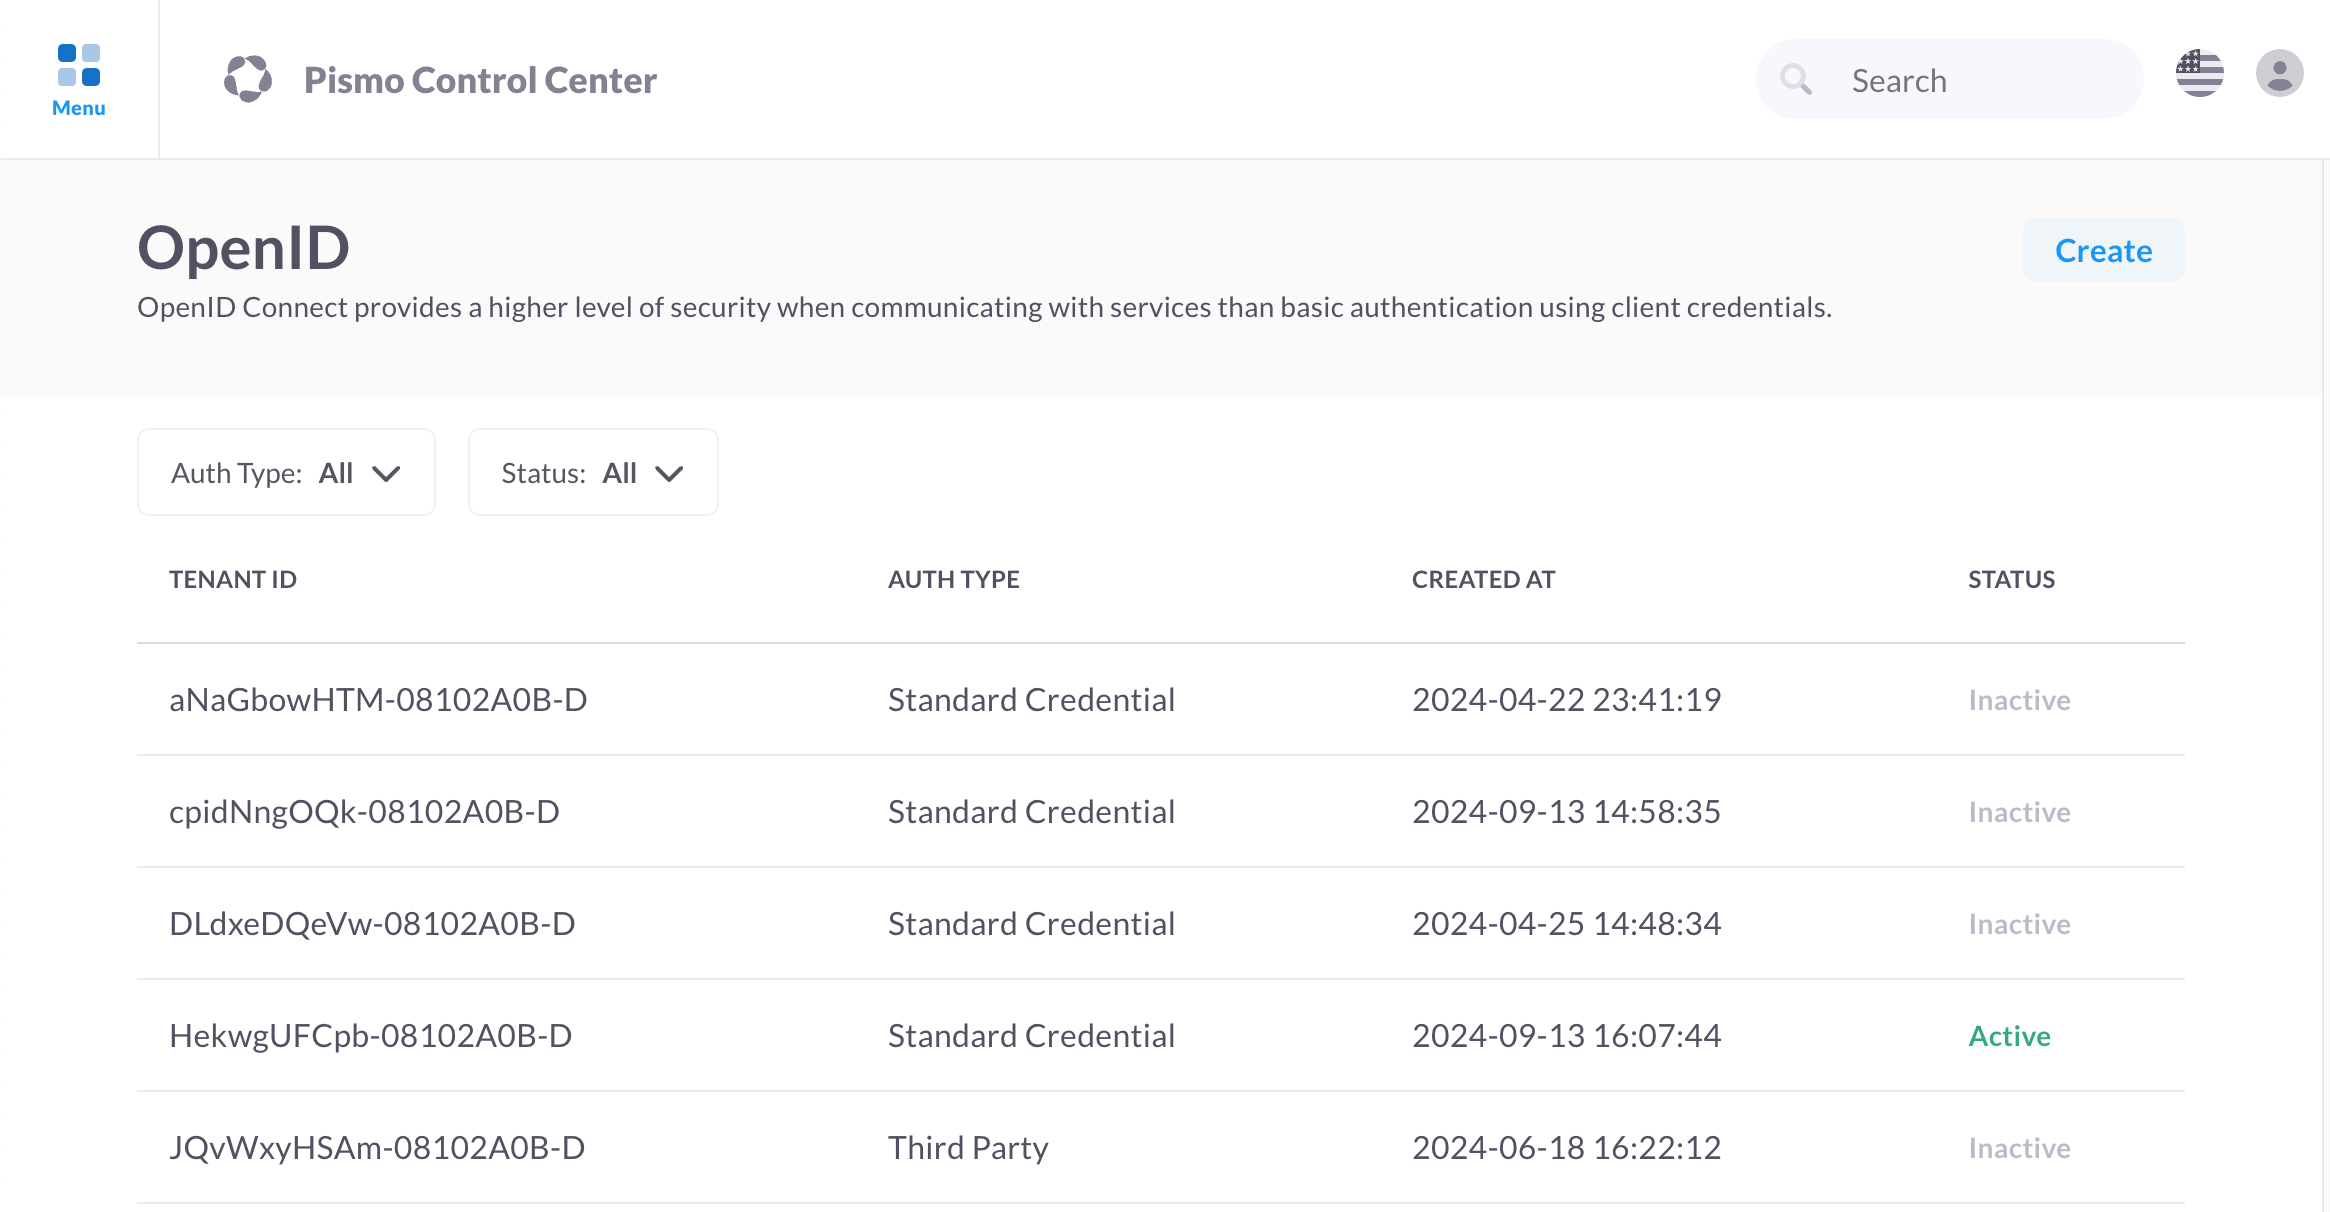
- On the main menu, click Organization > OpenID.
- On the OpenID screen, click Create.
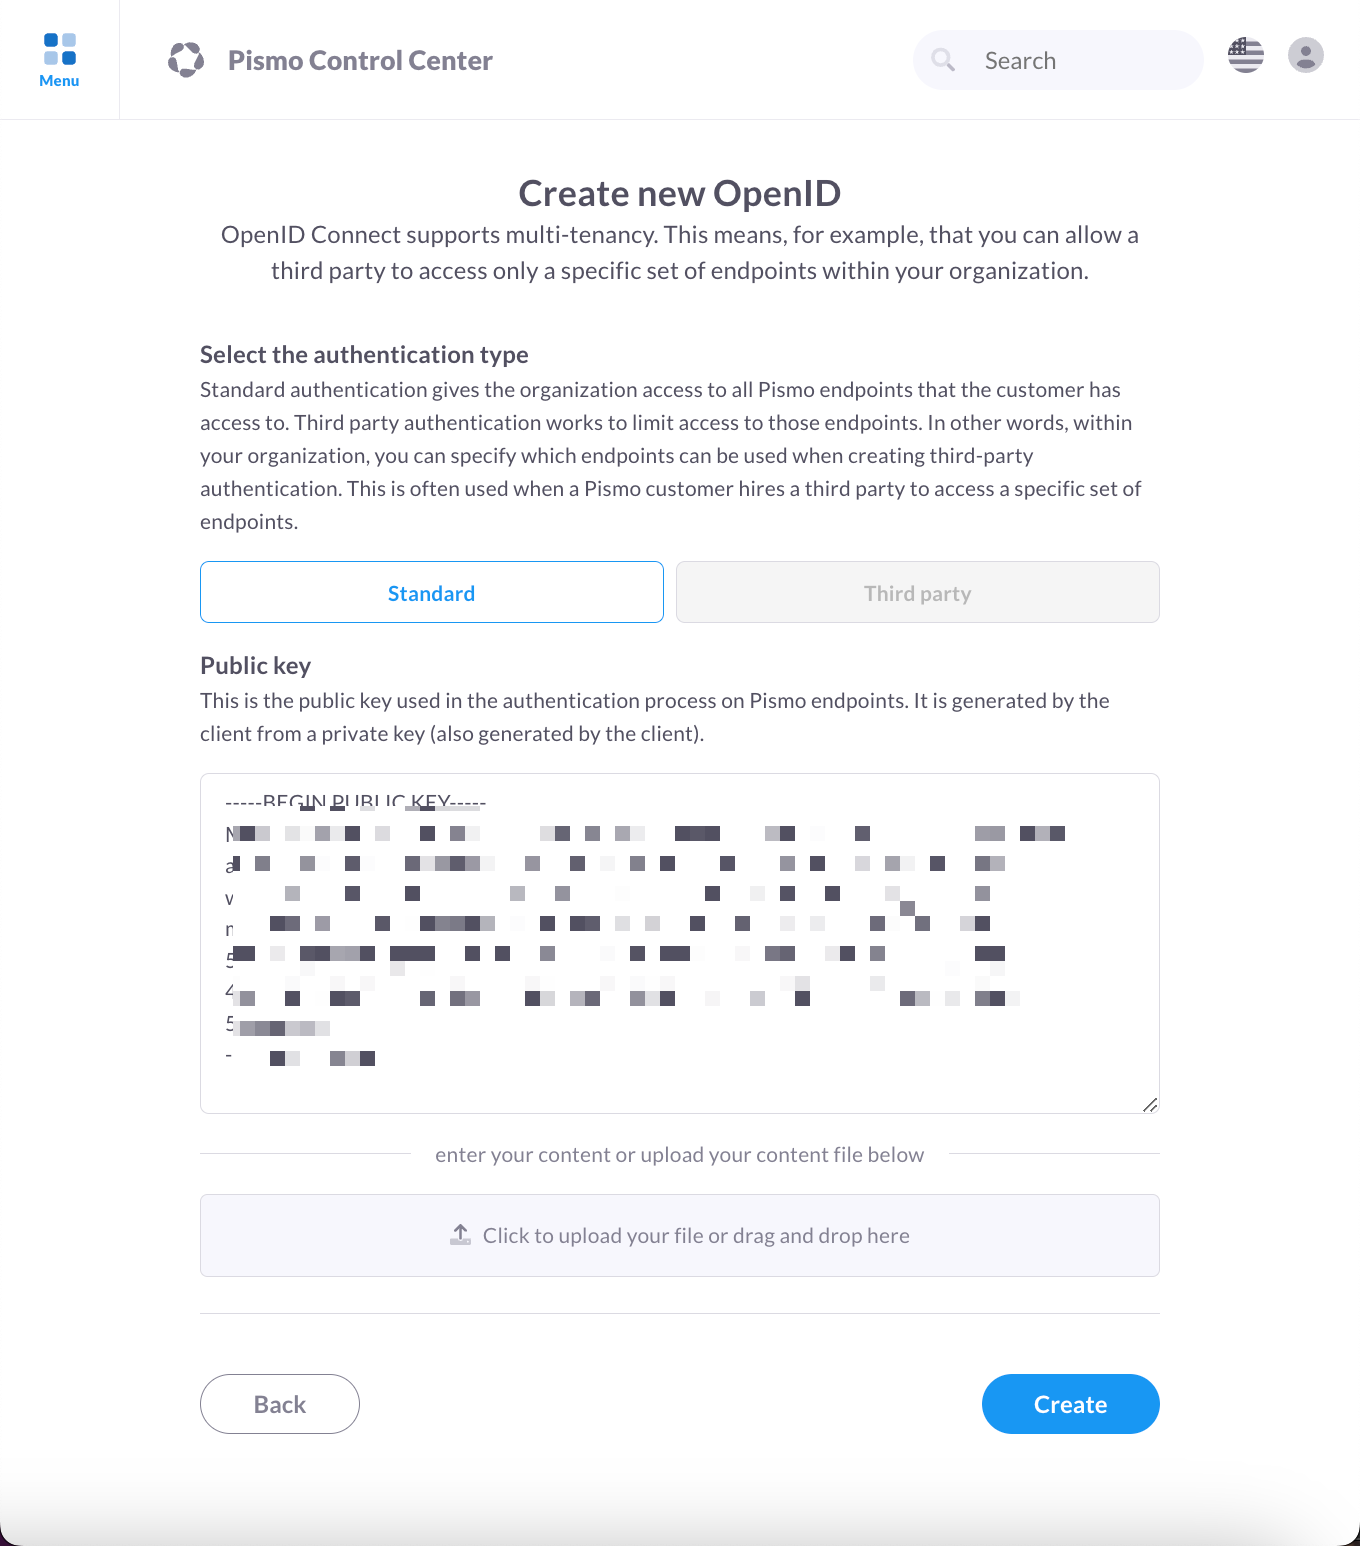
- On the Create new OpenID screen, select one of the following authentication types:
- Standard
- Third party
The third-party authentication type is not available in the current release.
- Provide the public encryption key, either by pasting it onto the Public key field or dragging a text file into the upload area of the screen.

- Click Create.
List OpenID authentication configurations
To list OpenID authentication configurations:
- On the main menu, click Organization > OpenID.

- On the OpenID screen, click an OpenID configuration to view its details.
View OpenID authentication configuration details
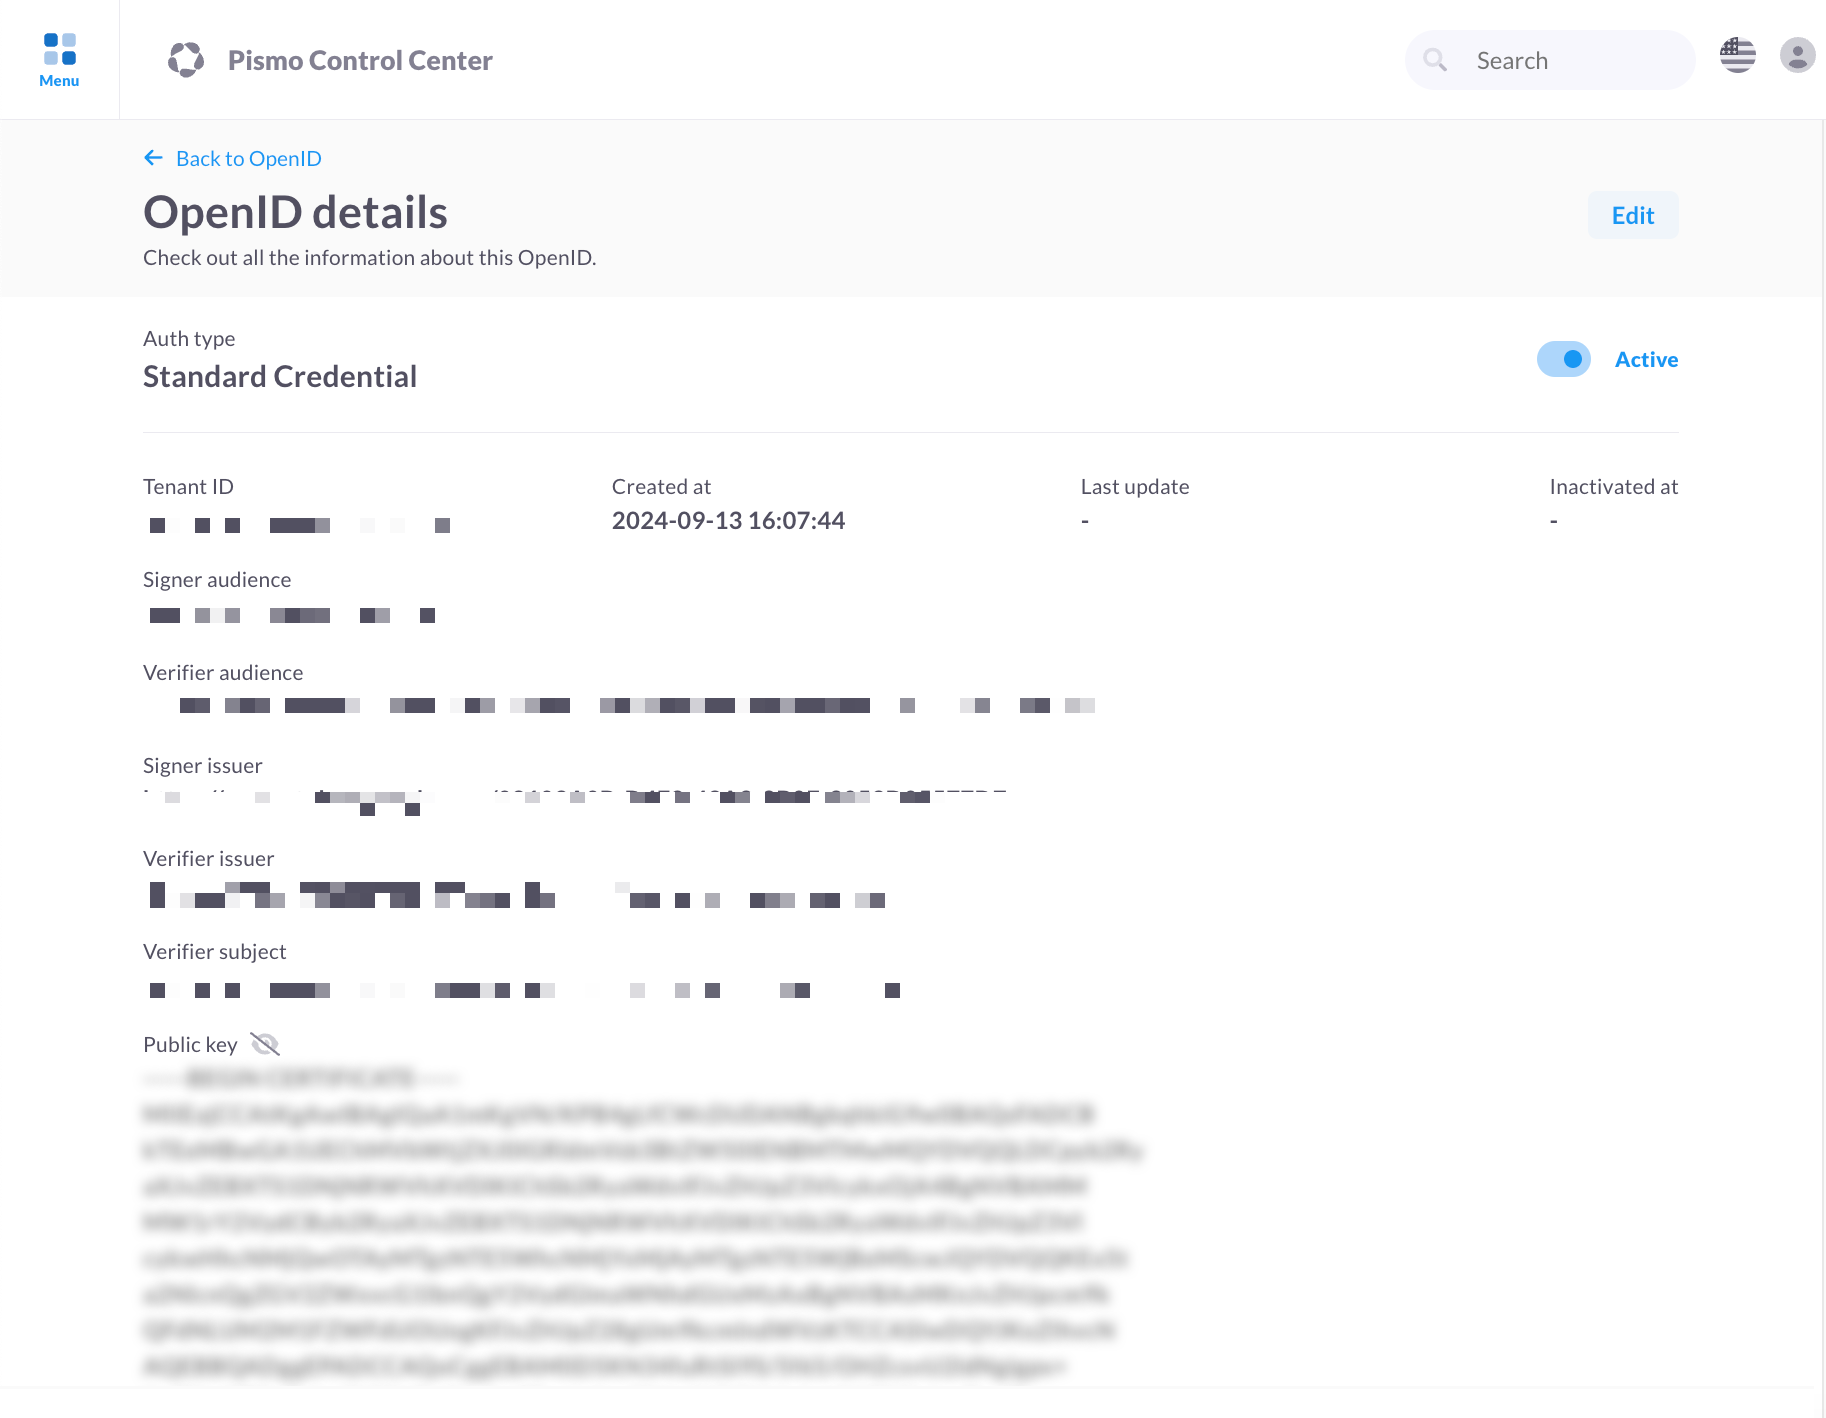
The following table describes the elements that make up an OIDC authentication details for a specific configuration.
| Field | Description | Example |
|---|---|---|
| tenant_id | Unique ID of a tenant or organization within a multi-tenant application. | tn-123456-A789-42A2-8B0E-2052D05577D7 |
| auth_type | Authentication type (STANDARD or THIRD_PARTY). | STANDARD |
| status | Status of the authentication configuration (ACTIVE or INACTIVE). | ACTIVE |
| public_key | Public encryption key used for authentication. | ----BEGIN CERTIFICATE---- MIIEajCCAtKgAwIBAgIQaA1mKgVN/KPB4gLfCWcDUDADCpyb2 . . . ----END CERTIFICATE----- |
| created_at | Timestamp when the authentication configuration was created. | 9/13/24 14:58 |
| update_at | Timestamp when the authentication configuration was last updated. | 9/13/24 14:58 |
| signer_audience | Audience for the signer. | Can be an ID or a URL. |
| signer_issuer | Issuer for the signer. | Can be an ID or a URL. |
| verifier_audience | Audience for the verifier. | Can be an ID or a URL. |
| verifier_issuer | Issuer for the verifier. | Can be an ID or a URL. |
| verifier_subject | Subject for the verifier. | Can be an ID or a URL. |
Deactivating a configuration
A configuration cannot be deleted, only deactivated. Once deactivated, it is not possible to reactivate a configuration.
To view OpenID authentication configuration details:
- On the main menu, click Organization > OpenID.
- On the OpenID screen, click the configuration you want to view.

- (Optional) On the OpenID details screen, do either of the following:
- Click the Active toggle to deactivate the OpenID authentication configuration.
- Click Edit to change the public key value.
Updated about 1 month ago