Manage embossing configurations
You can use the Pismo platform to issue physical cards, using embossing providers of your choice. For each program in your organization that needs to issue cards, you must work with your Pismo representative to establish an embossing configuration. For more information, see Physical card embossing.
One program can have multiple embossing configurations (but typically no more than three). You can toggle configurations between active and inactive states.
List embossing configurations
Once embossing configurations are set up for your organization, use Pismo Control Center to view details about them, including:
- Configuration name
- Configuration ID
- Name (of the provider)
- Type
- Status
Embossing groups
An embossing configurations can have two or more embossing groups, each with its own configured schedule and embossing provider. This is useful when you work with more than one provider or issue cards on different schedules.
When you use embossing groups, all cards must be linked to an embossing provider. If a card is not linked to an embossing group, it will not be embossed.
To list embossing configurations:
- On the main menu, choose Setup > Embossing.
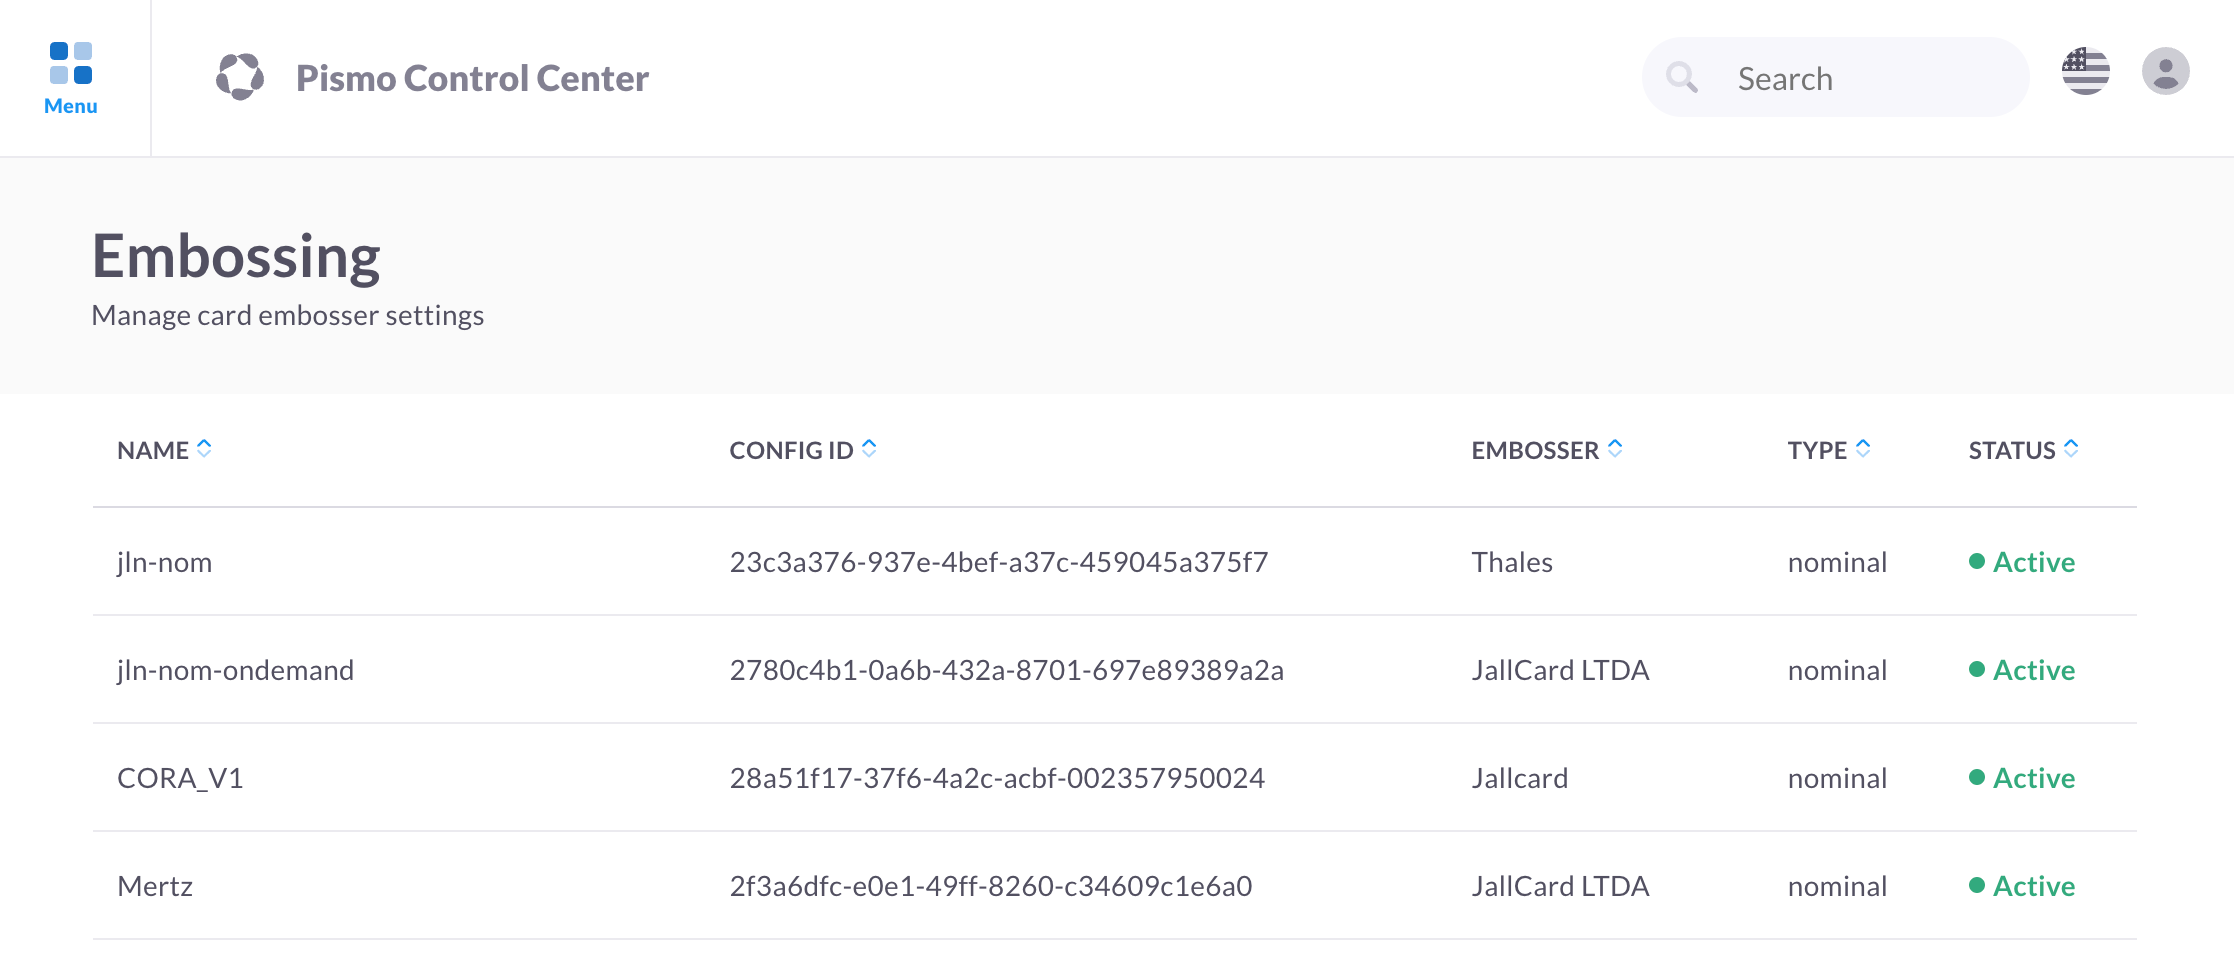
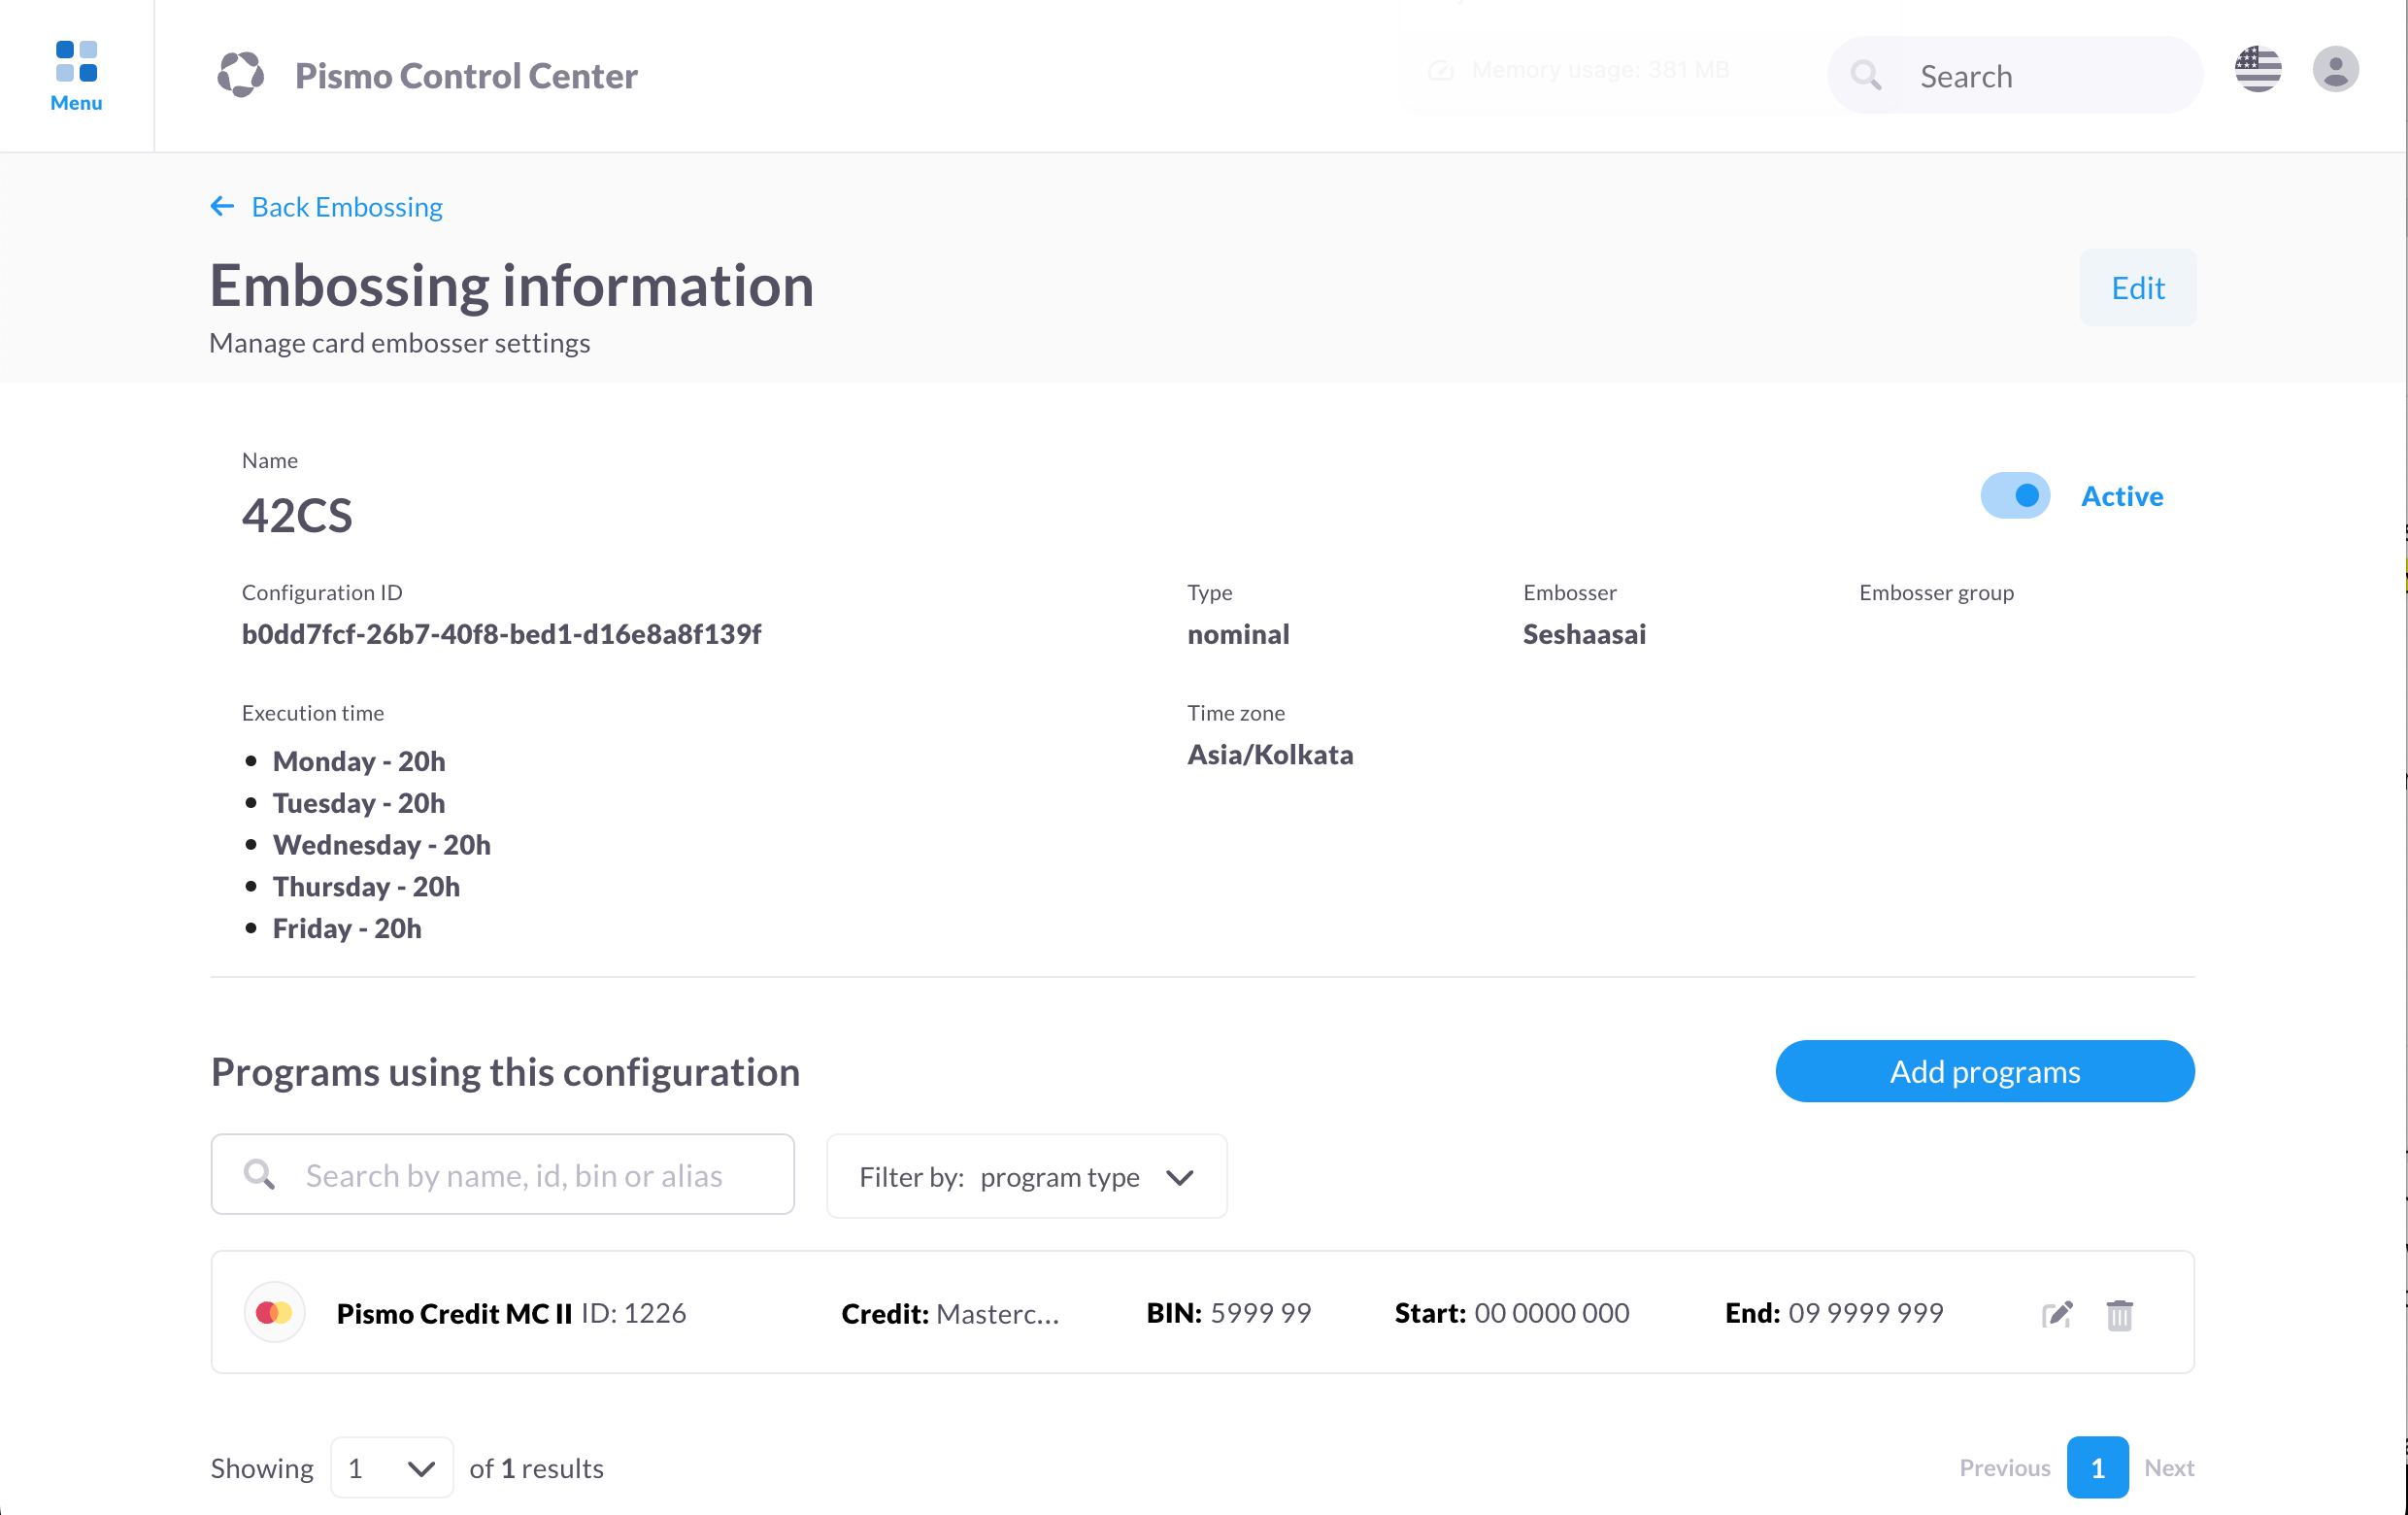
- On the Embossing screen, click the embossing configuration whose details you want to view. The Embossing information screen displays.
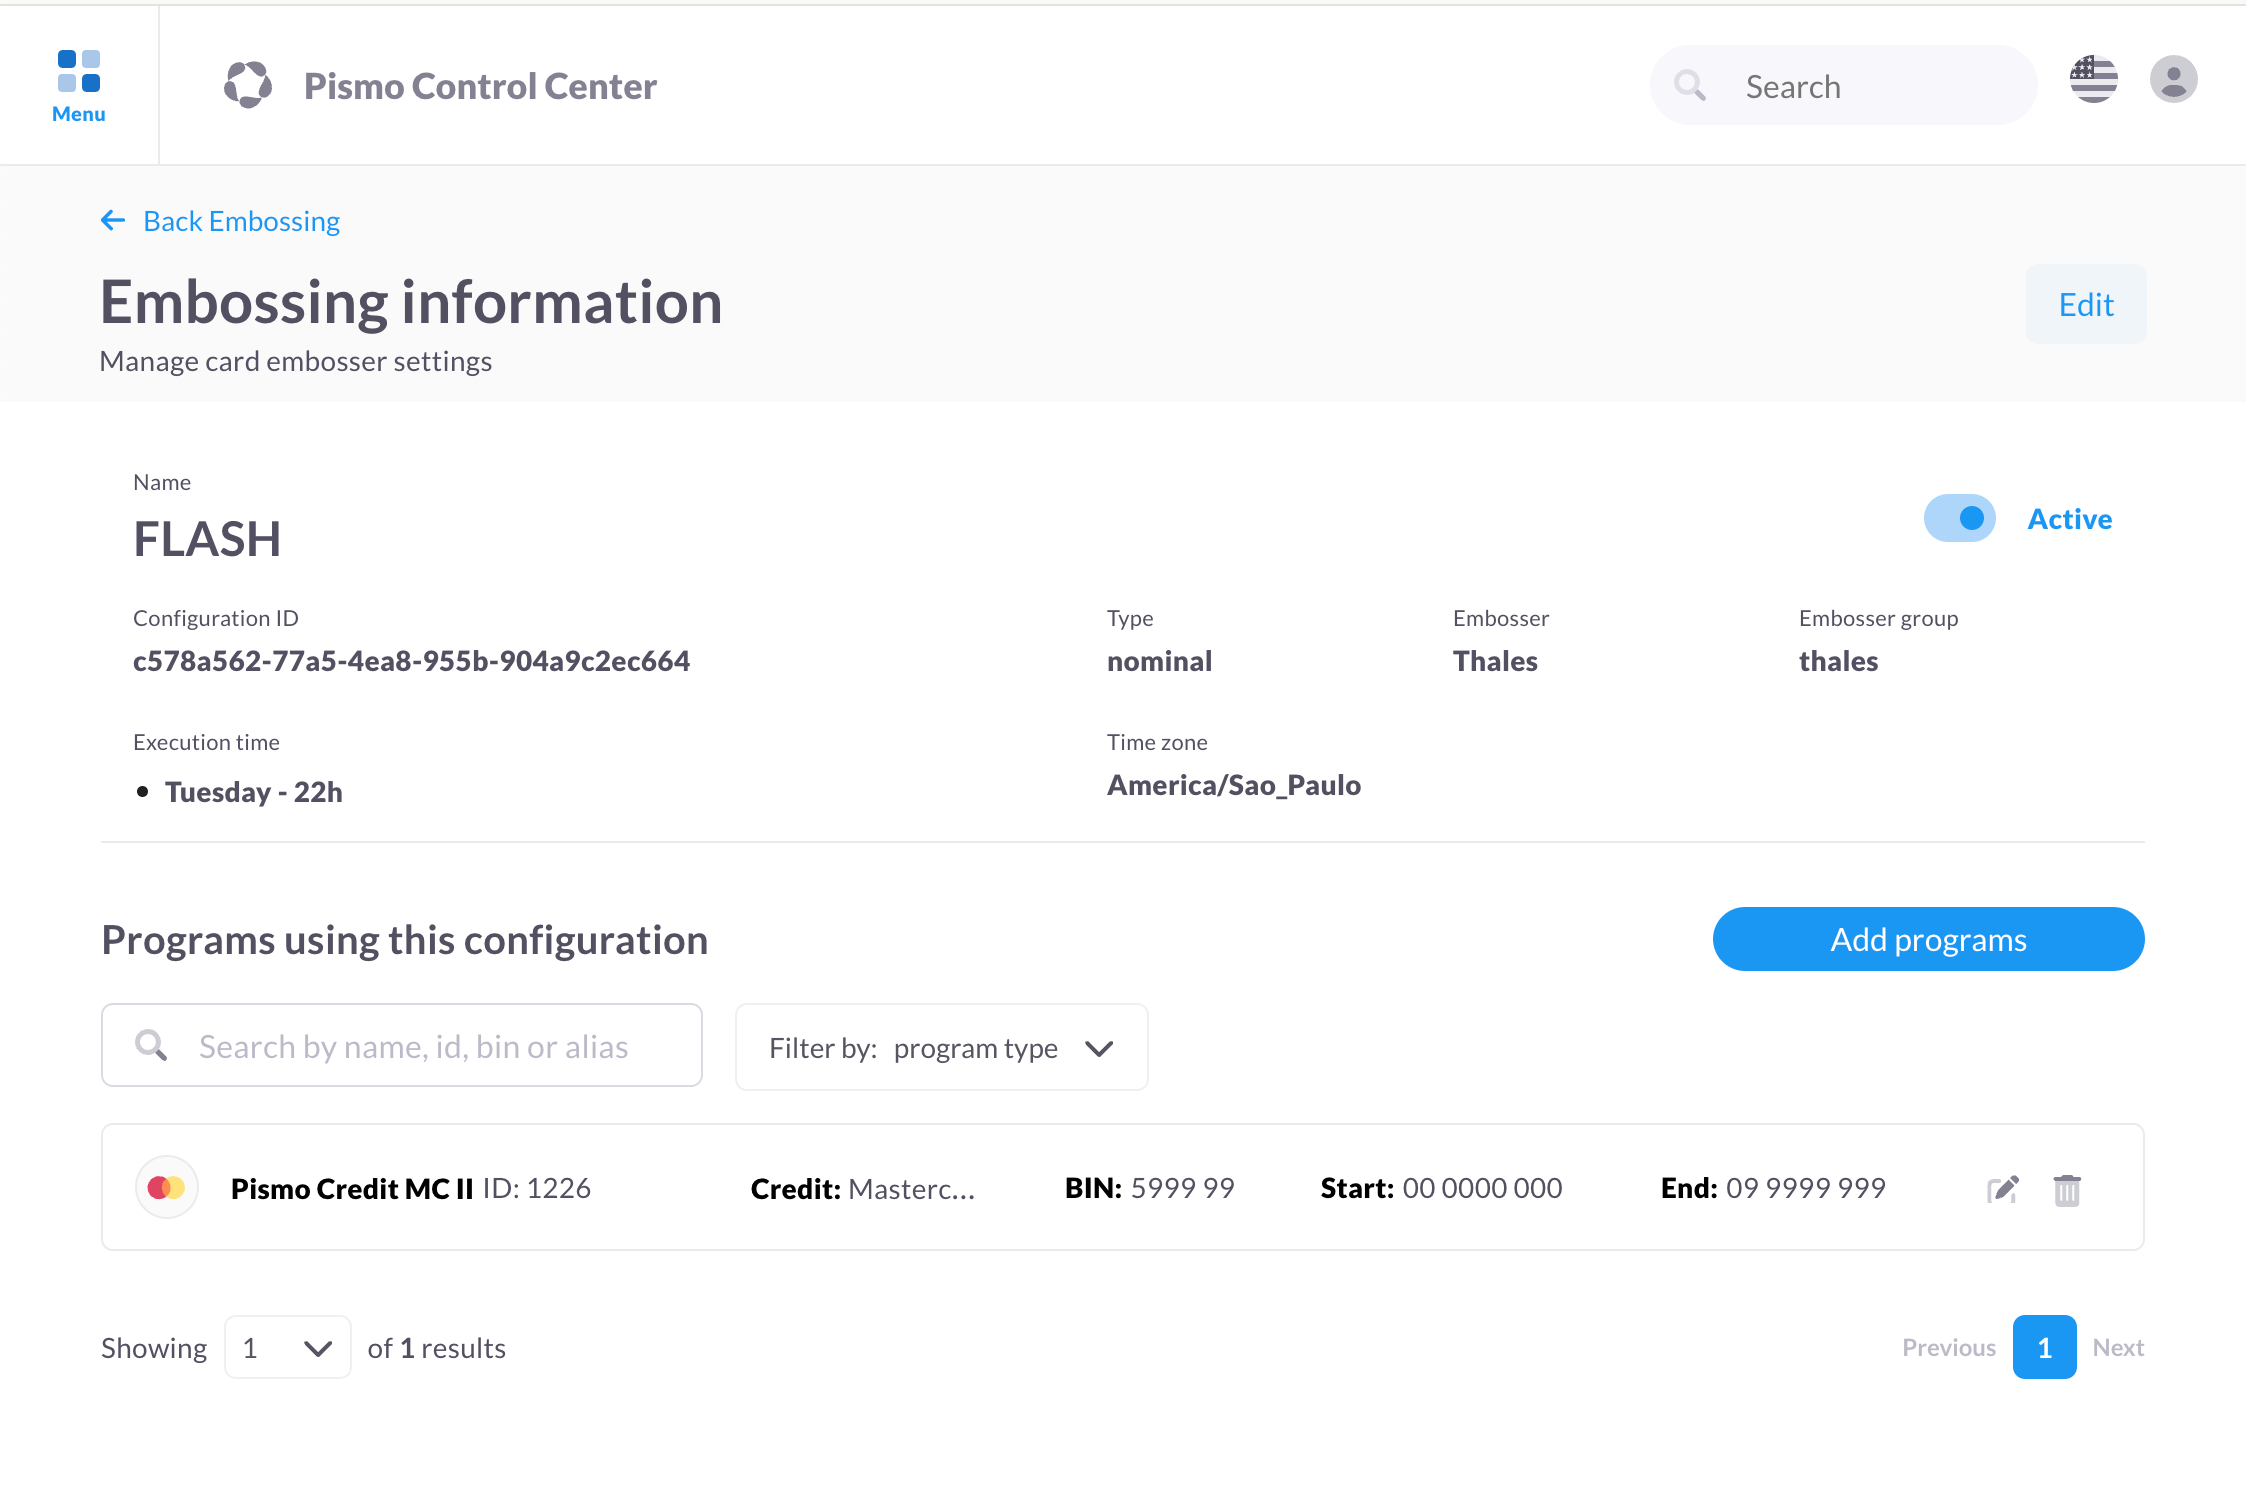
You also can view this information for a specific program on the Embossing tab on its Program info screen.
Edit an embossing configuration
To edit an embossing configuration:
- On the main menu, choose Setup > Embossing.
- On the Embossing screen, click the embossing configuration that you want to view.
- On the Embossing information screen, do any of the following:
- Activate or deactivate an embossing configuration
- Modify the schedule for executing embossing jobs
- Add or update a program alias
- Link a program with an embossing configuration
- Unlink a program from an embossing configuration
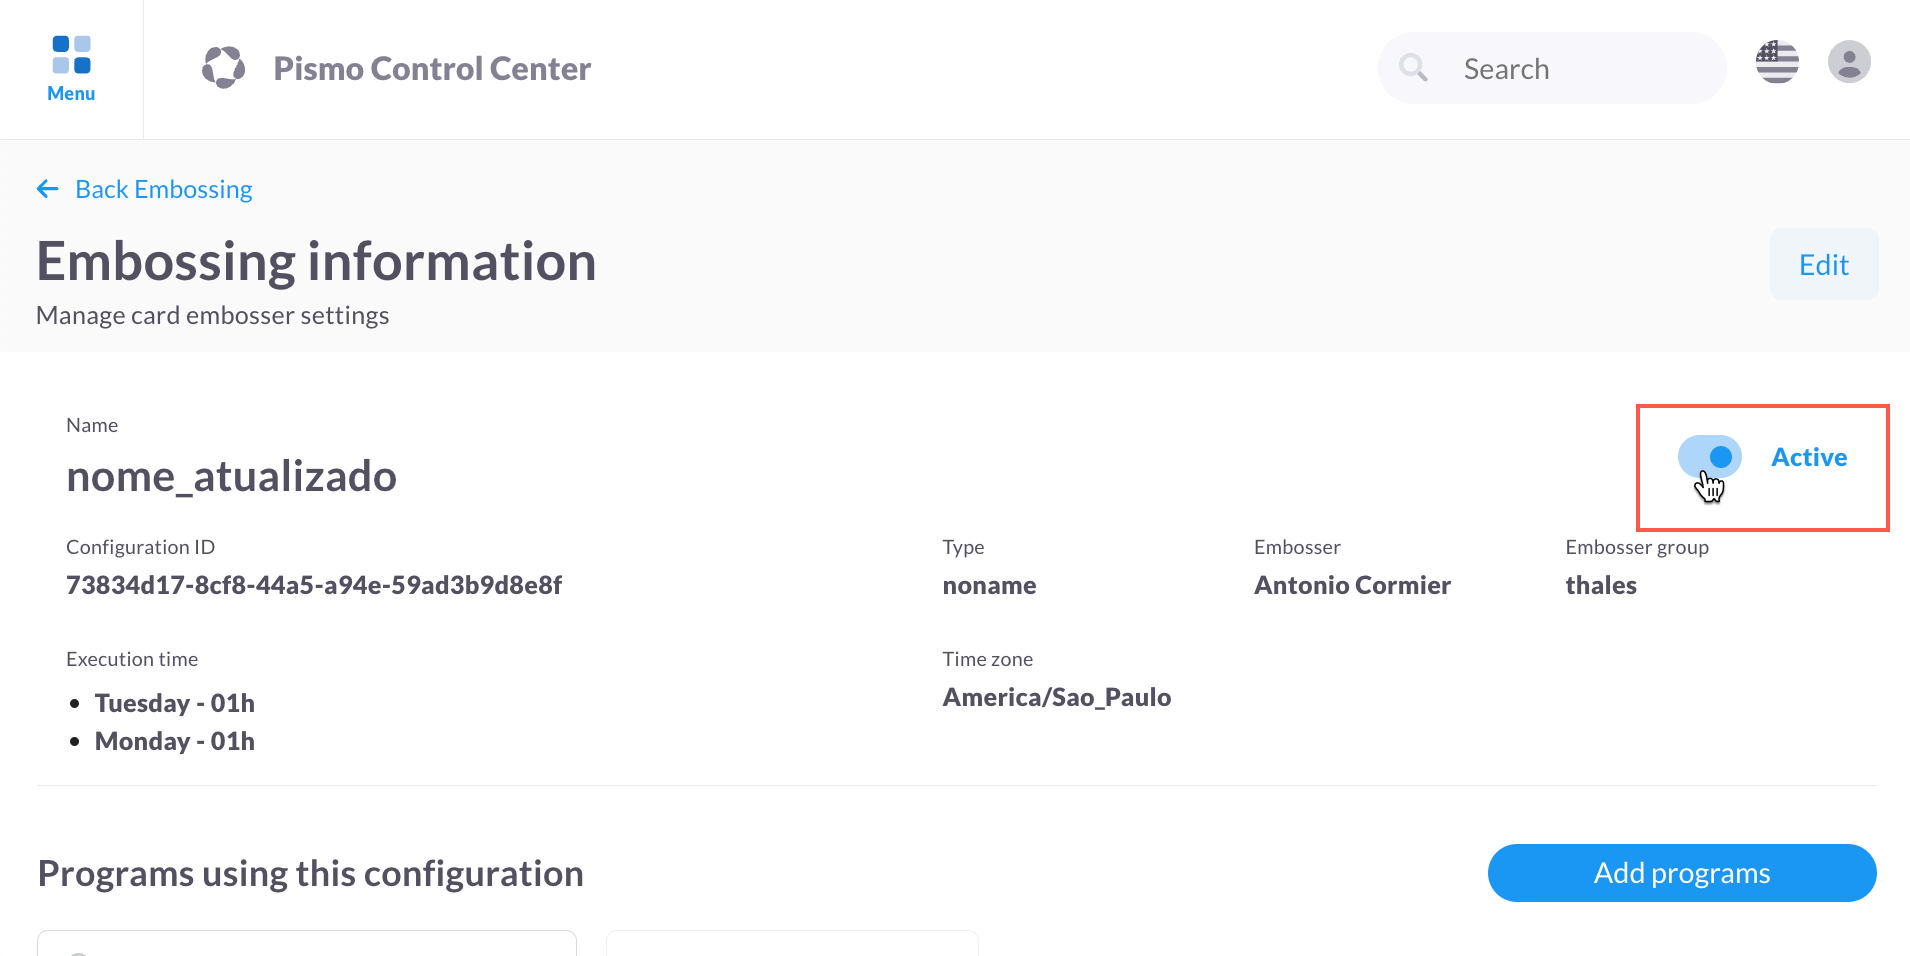
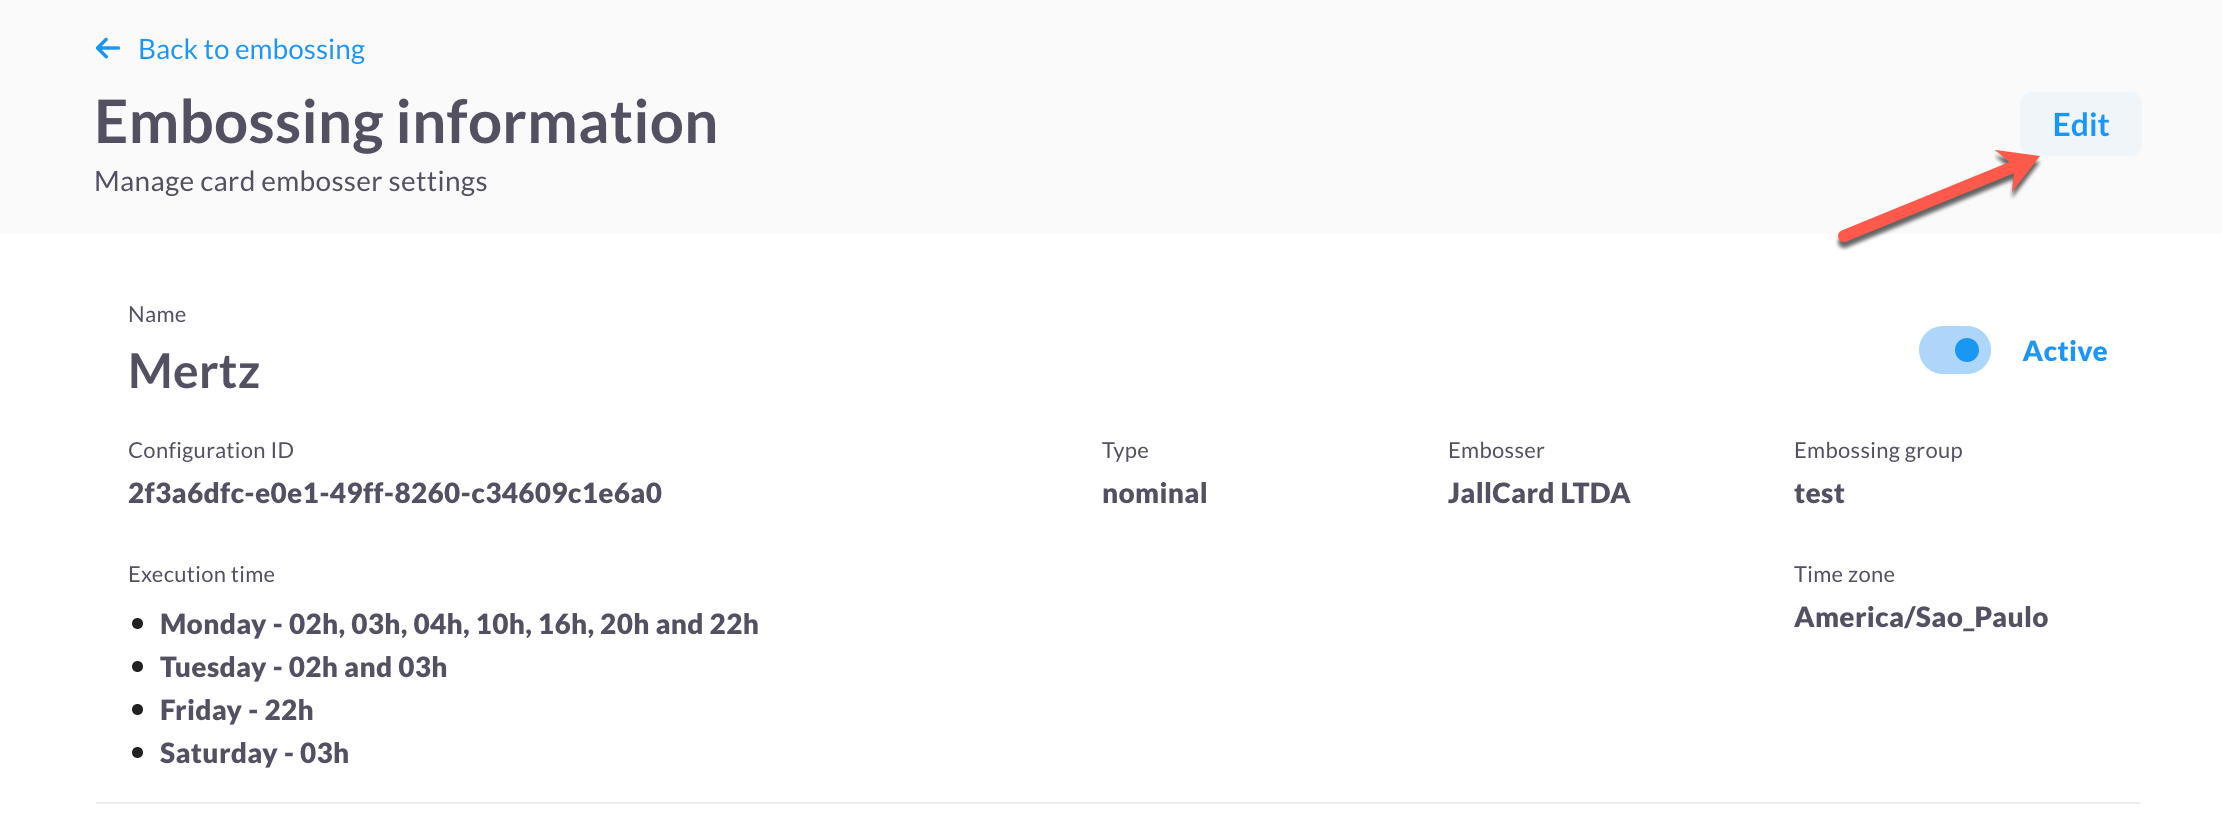
Activate or deactivate an embossing configuration
To activate or deactivate the embossing configuration:
- On the main menu, choose Setup > Embossing
- On the Embossing screen, click the embossing configuration that you want to view.
- On the Embossing information screen, click the Active toggle switch.
Modify the schedule for executing embossing jobs
You can modify the scheduled days and times for executing embossing jobs.
To modify the schedule for executing embossing jobs:
- On the main menu, choose Setup > Embossing
- On the Embossing screen, click the embossing configuration that you want to view.
- On the Embossing information screen, click Edit.
- On the Execution Time screen, edit the days and times for executing embossing jobs.
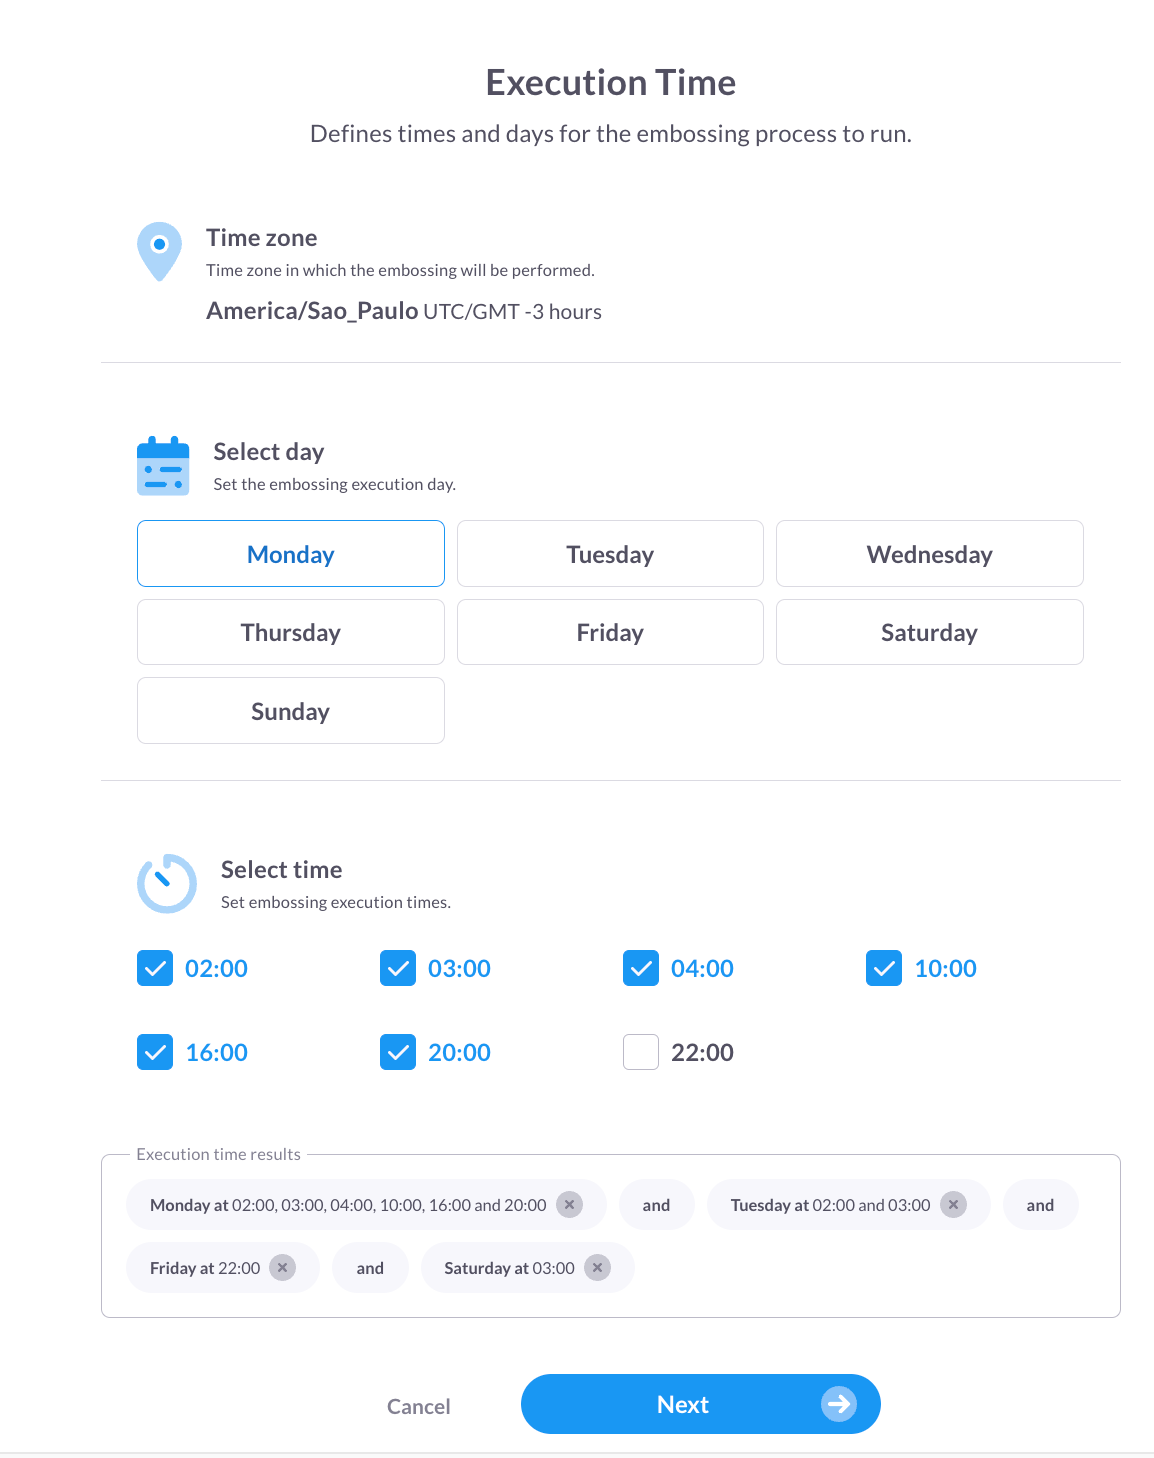
- Click Next.
- On the Review screen, confirm your changes and then click Finish.
Add or update an alias
By default, embossing configurations are named according to the following pattern:
<ISSUER_NAME>_<EMBOSSER_NAME>_<YYYY_MM_DD_HHMMSS>_<PROGRAM_ID>.pgp
Defining an alias for the configuration is useful in cases where there are different filename requirements from an issuer or embosser. Aliases also can provide alternative names that are easier to read.
To add or update a program alias:
- On the main menu, choose Setup > Embossing.
- On the Embossing screen, click the embossing configuration that you want to view.
- On the Embossing information screen, click the Edit icon in its row.
- Enter an alias name in the text field provided.

- Click Save.
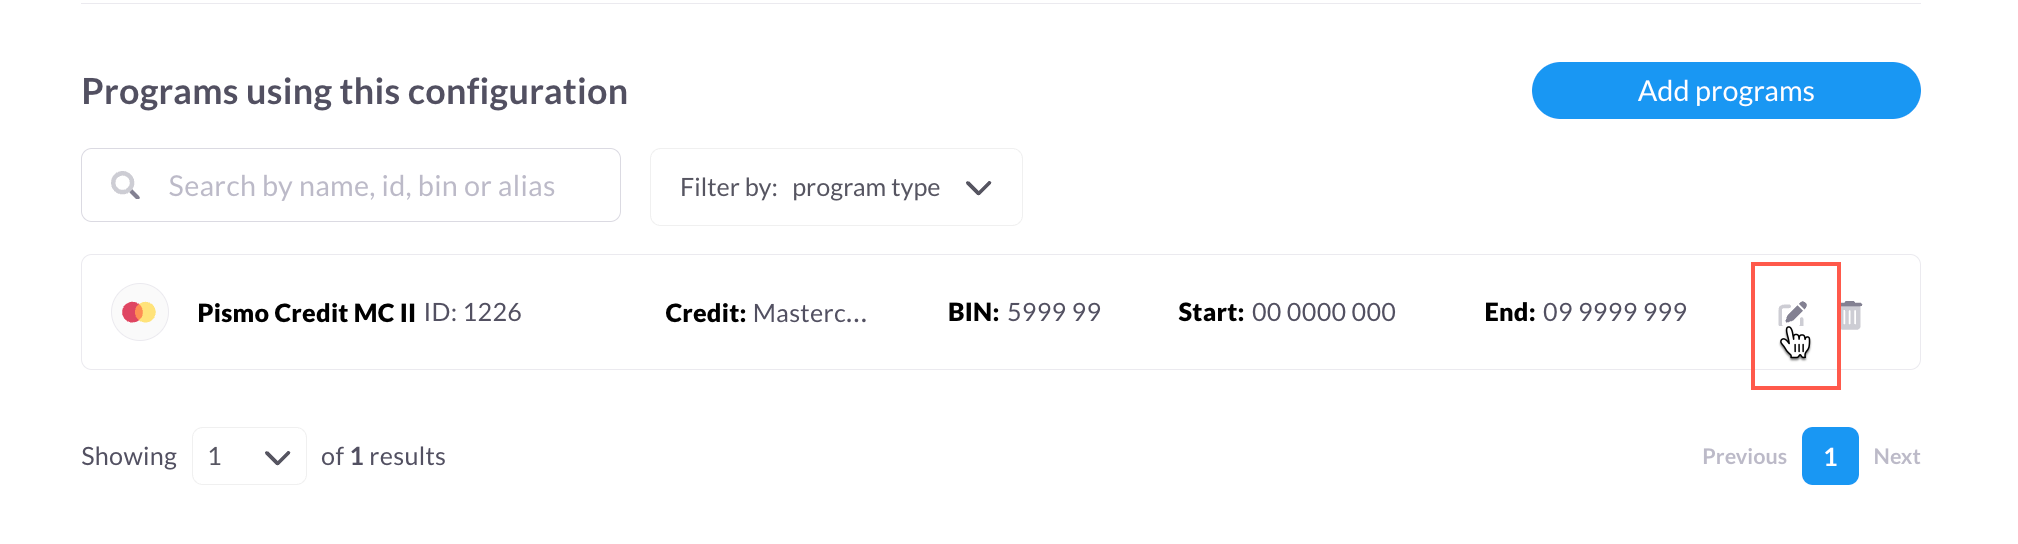
Link a program with an embossing configuration
To link a program with an embossing configuration:
-
On the main menu, choose Setup > Embossing
-
On the Embossing screen, click the embossing configuration that you want to view.
-
To link a program with the embossing configuration, click the Add programs button.
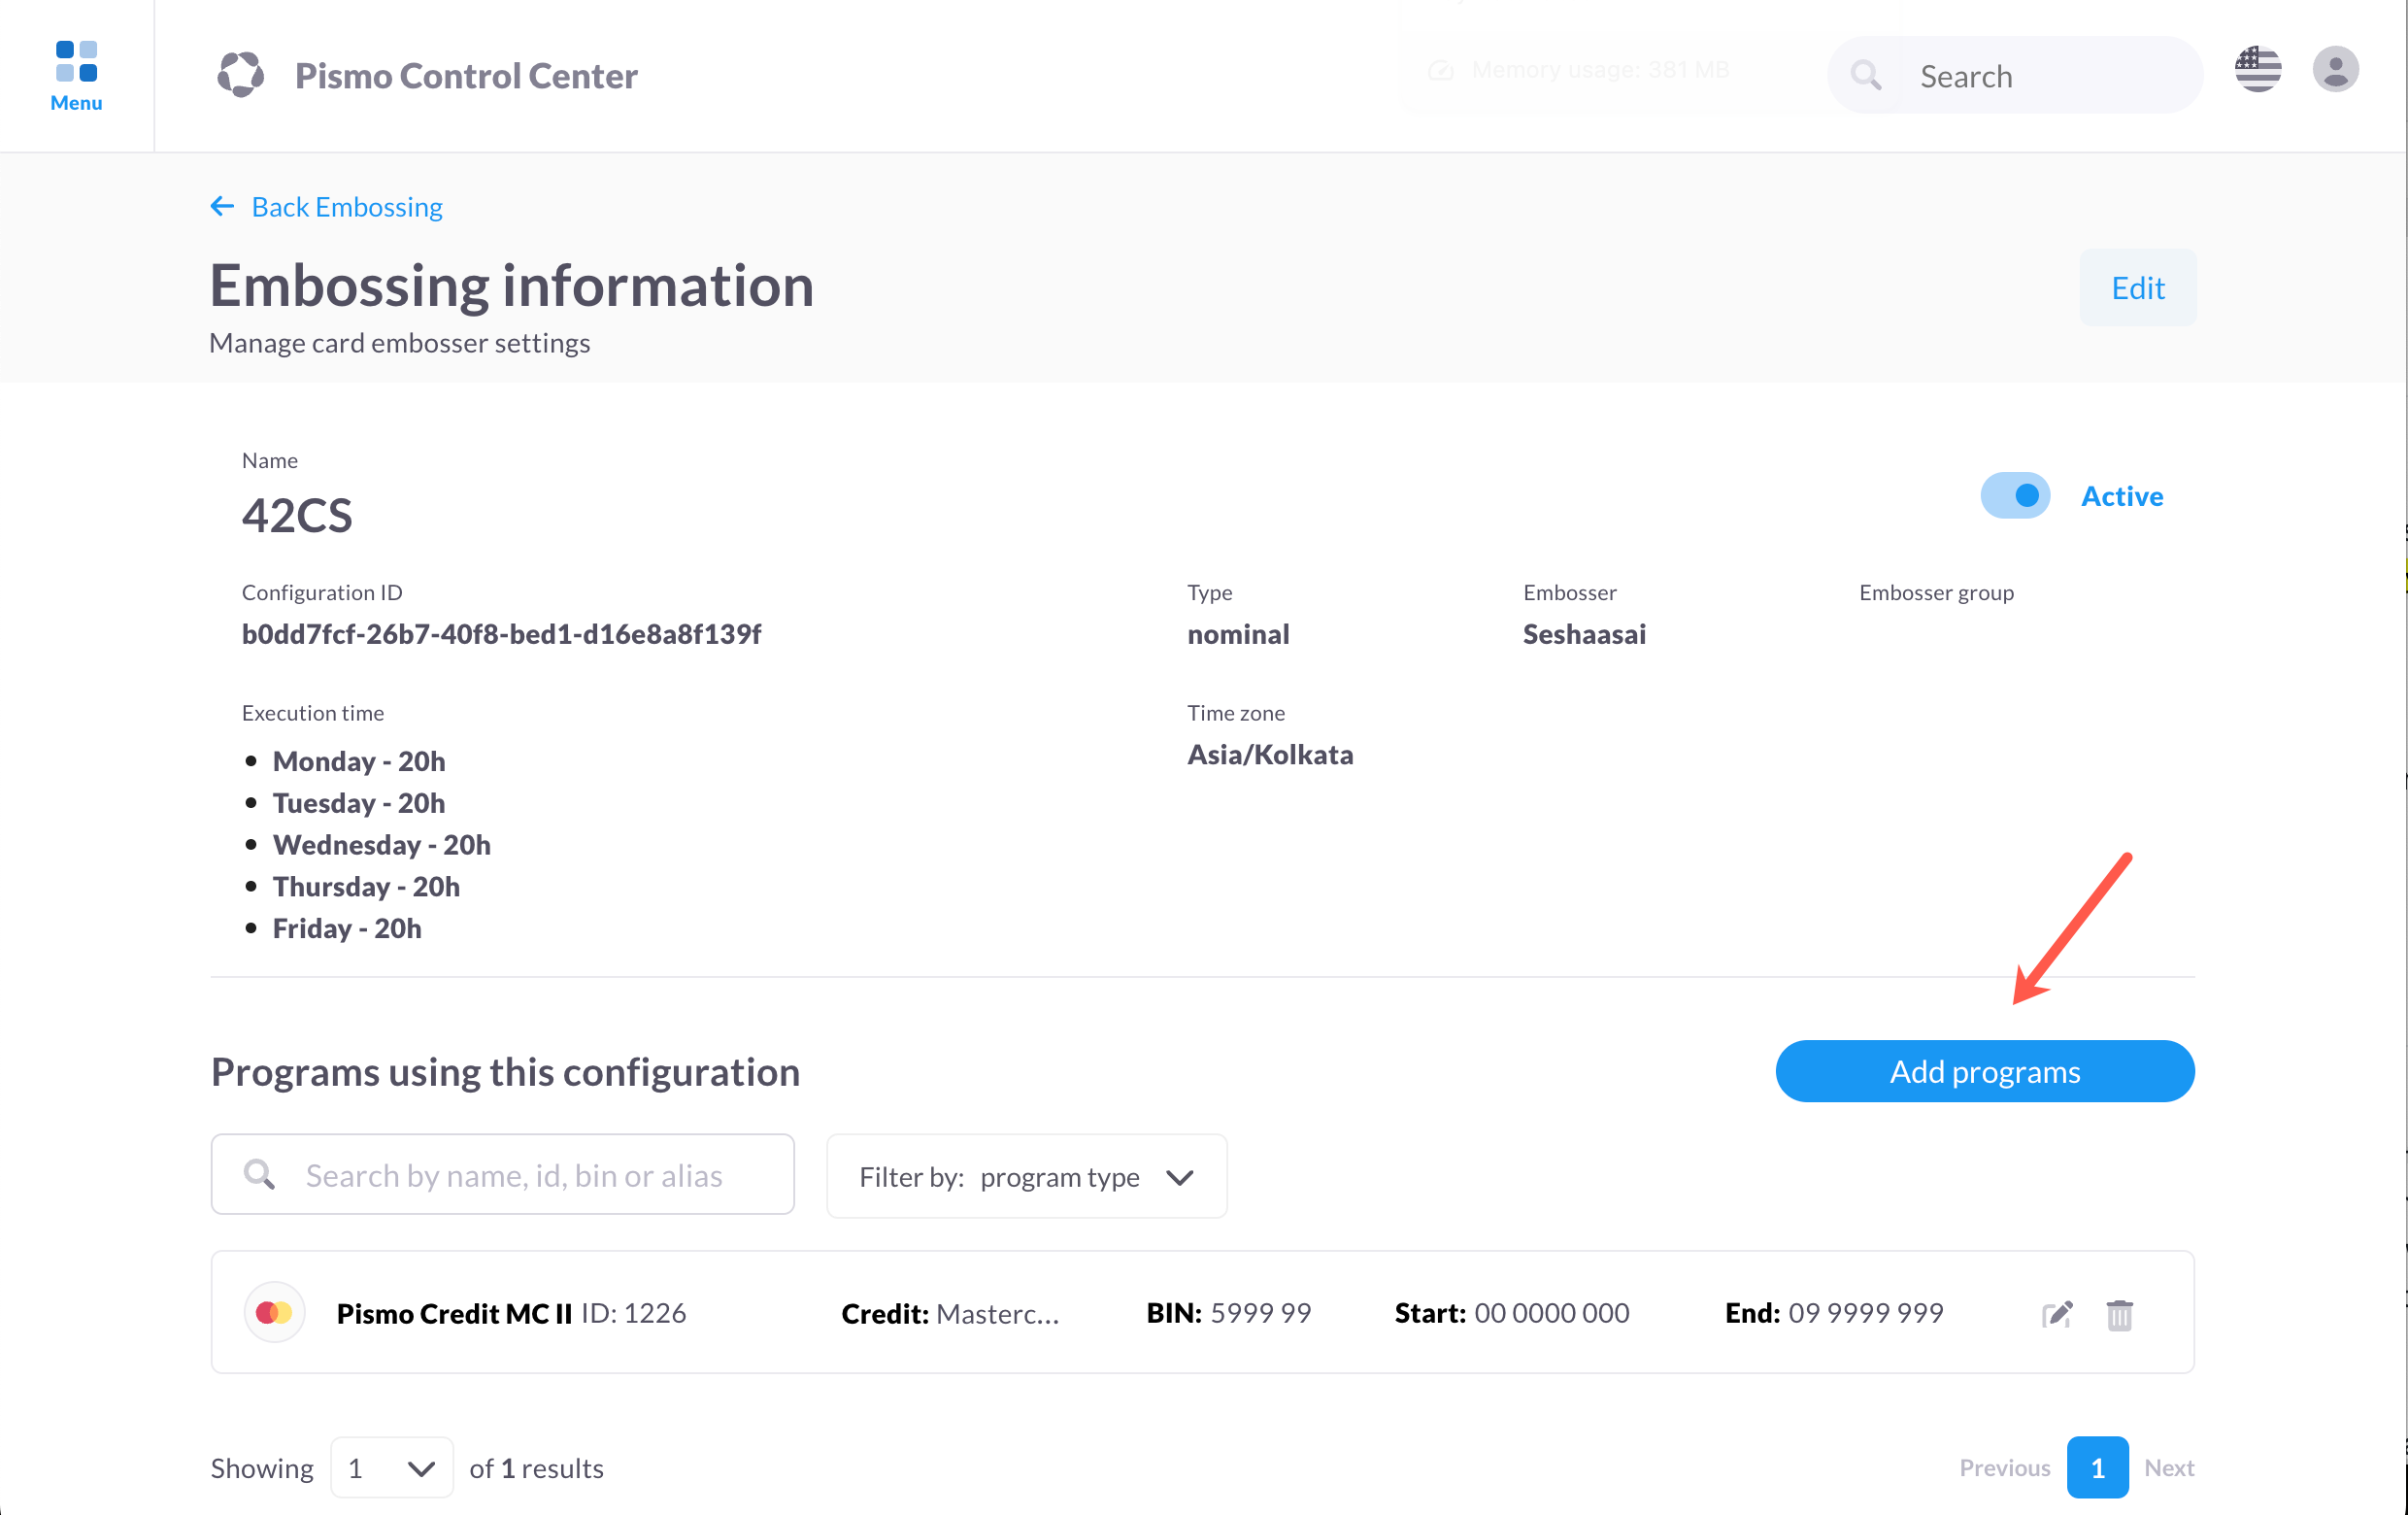
- On the Programs screen, find the program that you want to add, and then click its Add button.
- On the Review screen, confirm your changes and then click Finish.
Unlink a program from an embossing configuration
To unlink a program from an embossing configuration:
-
On the main menu, choose Setup > Embossing.
-
On the Embossing screen, click the embossing configuration that you want to view, and then click its Delete icon.
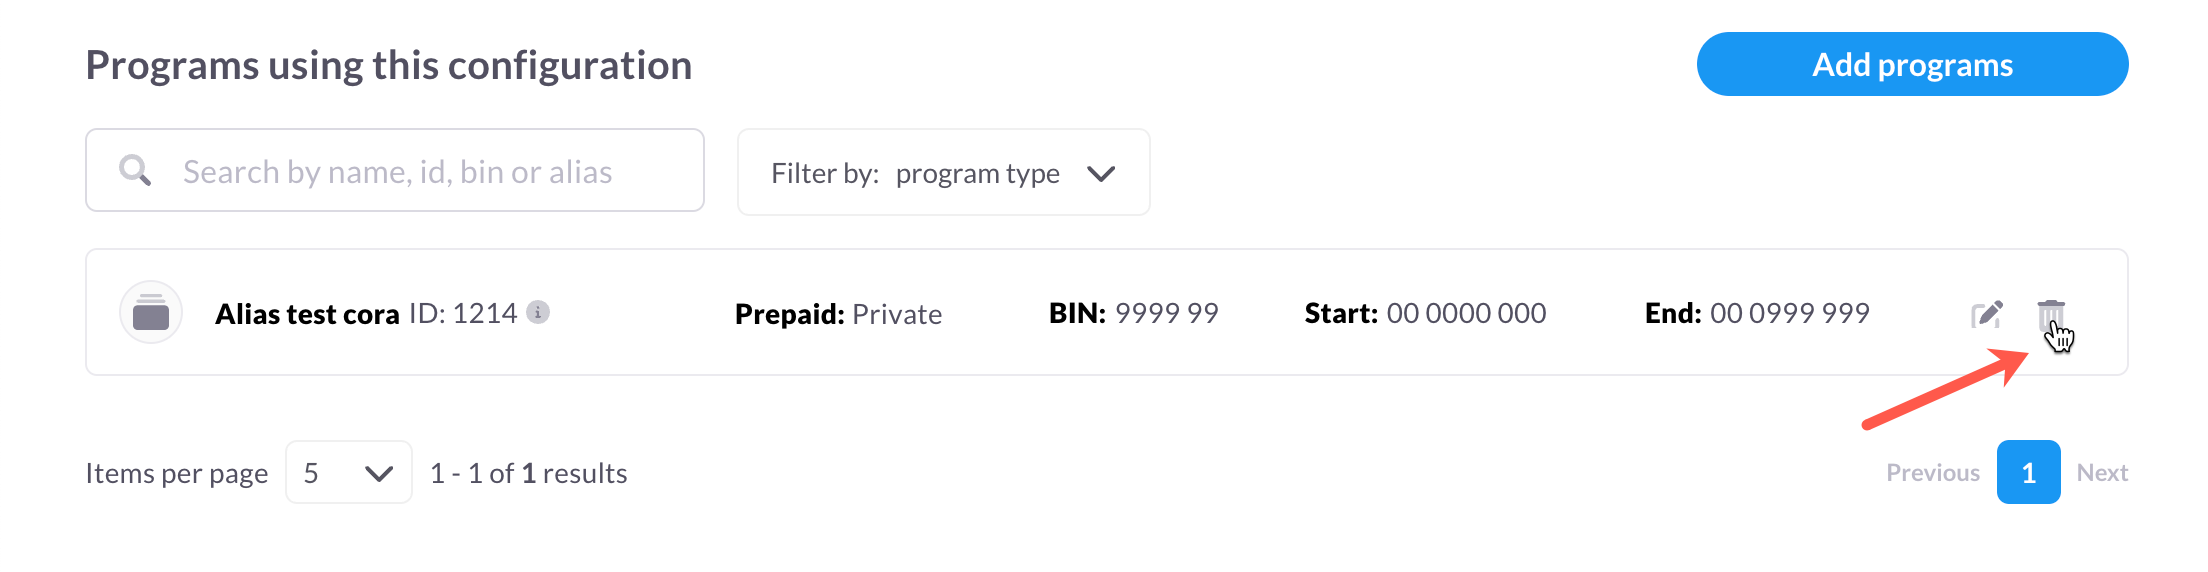
- Click Yes to confirm.
Updated 2 months ago