Manage fee models
Pismo Control Center enables you to define fee models and attach them to your operations on the Pismo platform. A fee model is a structure that contains one or more fees. For more information, see Fee models.
You can attach a fee model at the following levels of detail:
- Organization: Attach to all accounts in your organization, regardless of which program contains the account.
- Program: Attach to all accounts within a specific program.
- Account: Attach to selected accounts, regardless of which program they are in.
Note that these levels are hierarchical — for any operation performed on an account, the platform applies the most specific fee model, starting with the account level.
A new fee model is detached by default. When you create one, you also must attach it to an account, a program, or an organization. Otherwise, it will not be applied.
You can't use Control Center to attach a fee models to accounts. Do do this, use the endpoint Attach fee model to account.
Optionally, you can link a fee model with one or more platform operations, such as a credit transaction. To do this, attach one or more processing codes to the fee model. For more information, see Processing codes and transaction types. In cases where no charges are applied, simply do not include a processing code.
You can think of a fee model as a container for the fees and taxes that are applied to account activities. When you define a fee, you can optionally specify the method used to calculate it, either fixed value or percentage. The platform provides a variety of calculation methods for this purpose. For more information, see Fee models.
View fee models and fees
To view fee models and fees:
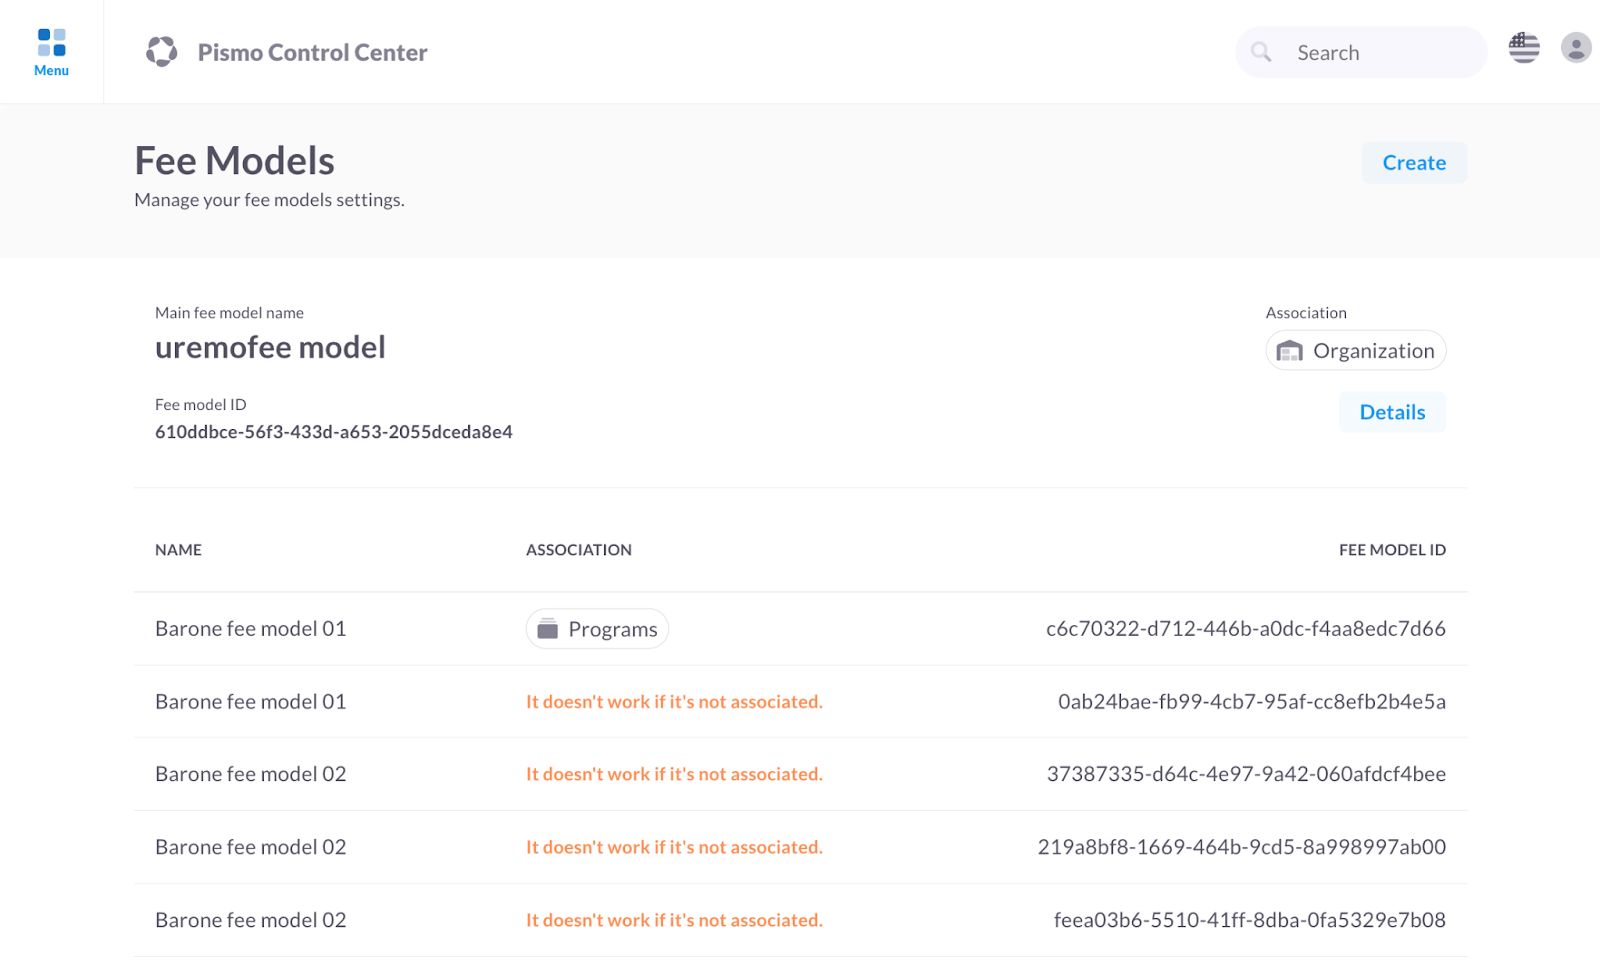
- On the main menu, click Setup > Fee models.
- On the Fee Models screen, the default fee model attached to the Organization appears at the top. Below this is a table of all fee models that are added to the Organization.
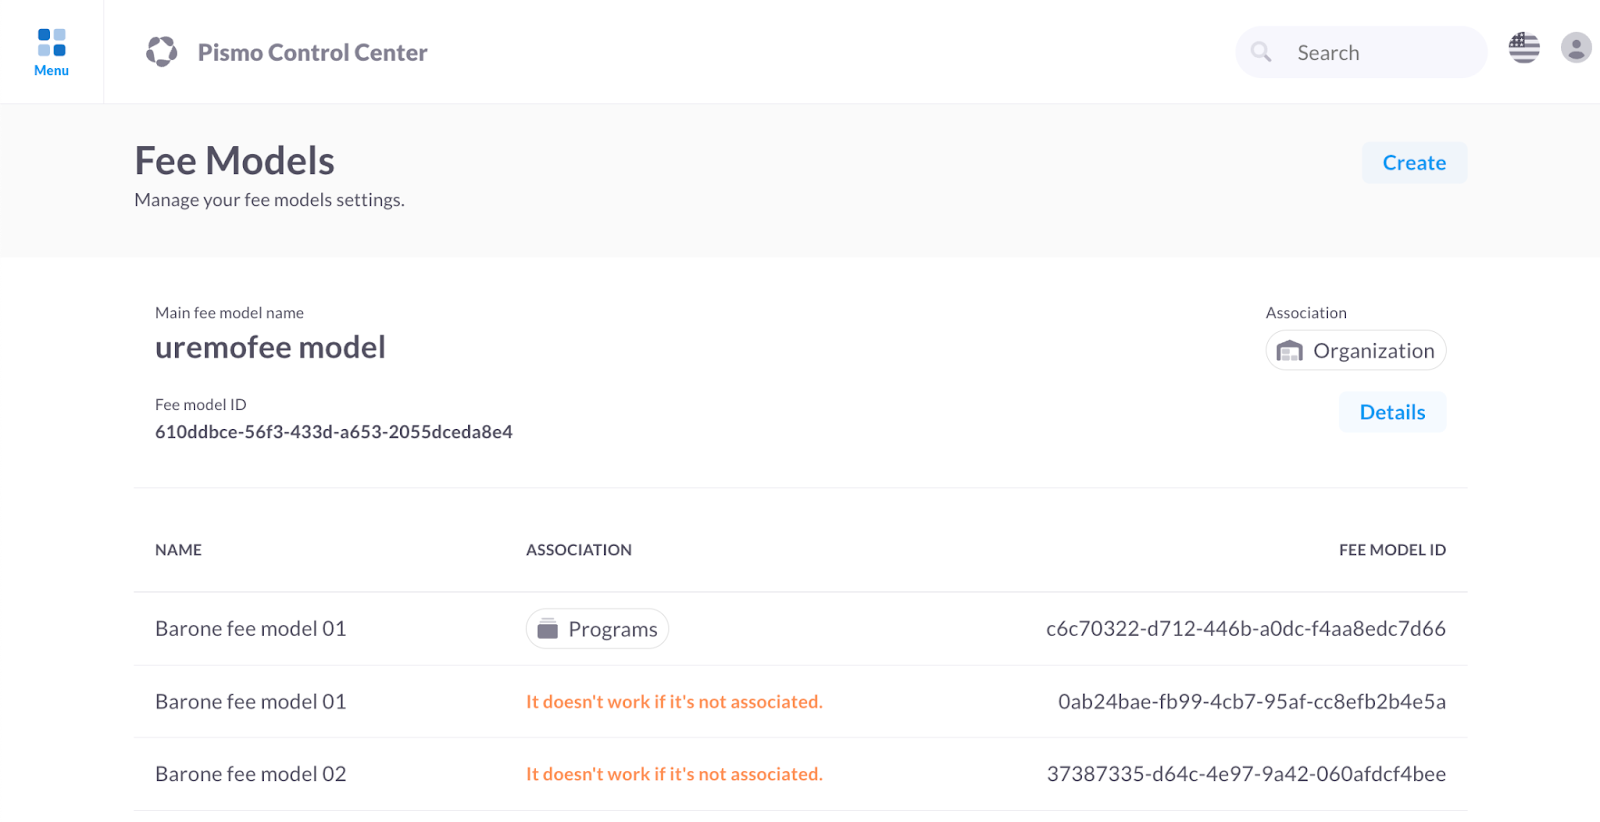
- Click a fee model to view its details.
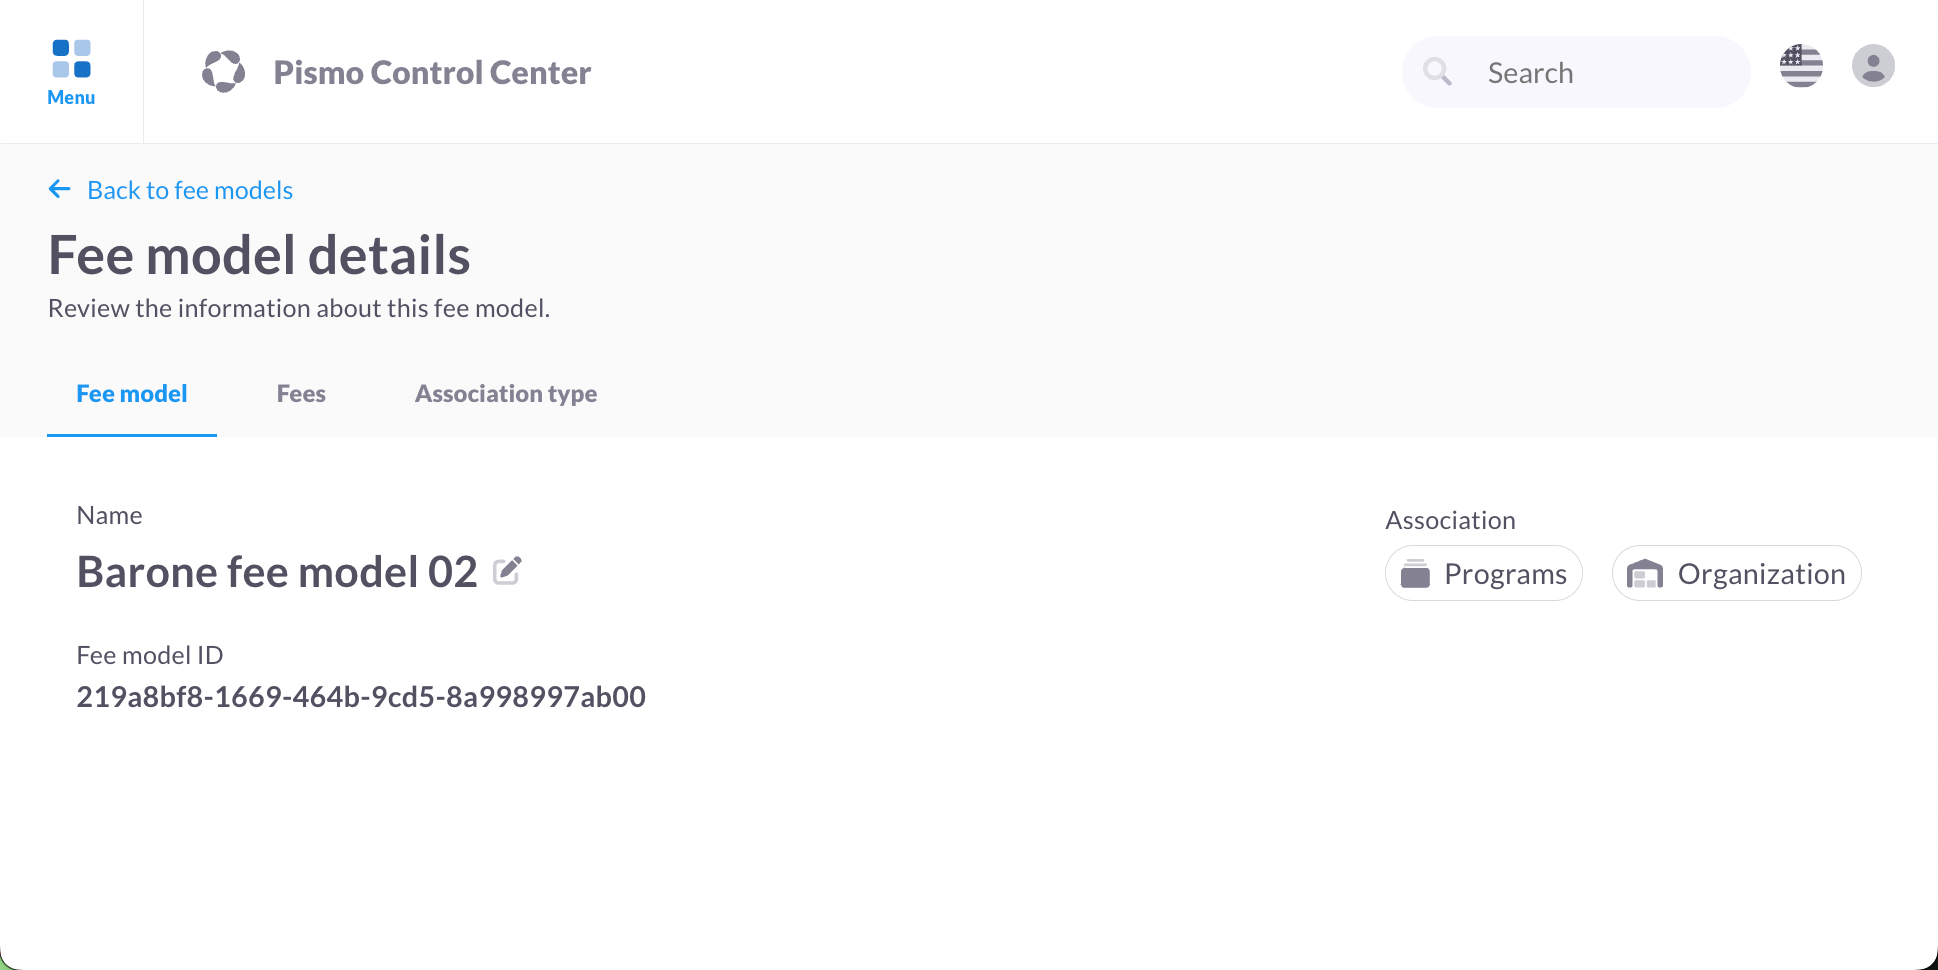
- On the Fee model details screen, click one of the following tabs to view more information:
- Fee model: View the name and ID of the fee model. This screen also shows the platform objects (such as programs and accounts) where the fee model is attached.
- Fees: View and manage the fees that belong to the fee model.
- Association type: View the platform objects to which the fee model is currently attached.
Add a fee model
You can delete all of the fees in a fee model, but not the model itself.
A new fee model is detached by default. When you create one, you also must attach it to an organization, a program or an account.
To add a fee model:
- On the main menu, click Setup > Fee models.
- On the Fee models screen, click Create.
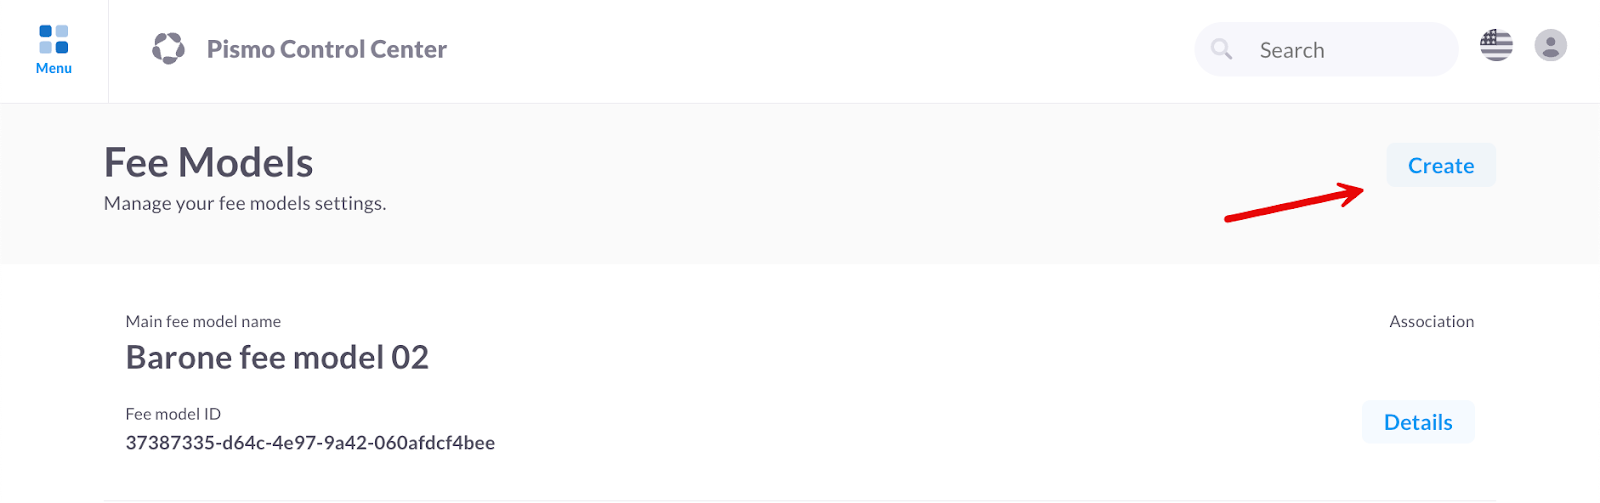
- On the Add fee model screen, enter a name for the fee model in the Name field.
- Click Finish.
Add a fee
To add a fee:
- On the main menu, click Setup > Fee models.
- Do one of the following:
- To add a fee to the default fee model attached to the Organization, click the Details button.
- To add a fee to a different fee model, click the model you want to edit in the results list.
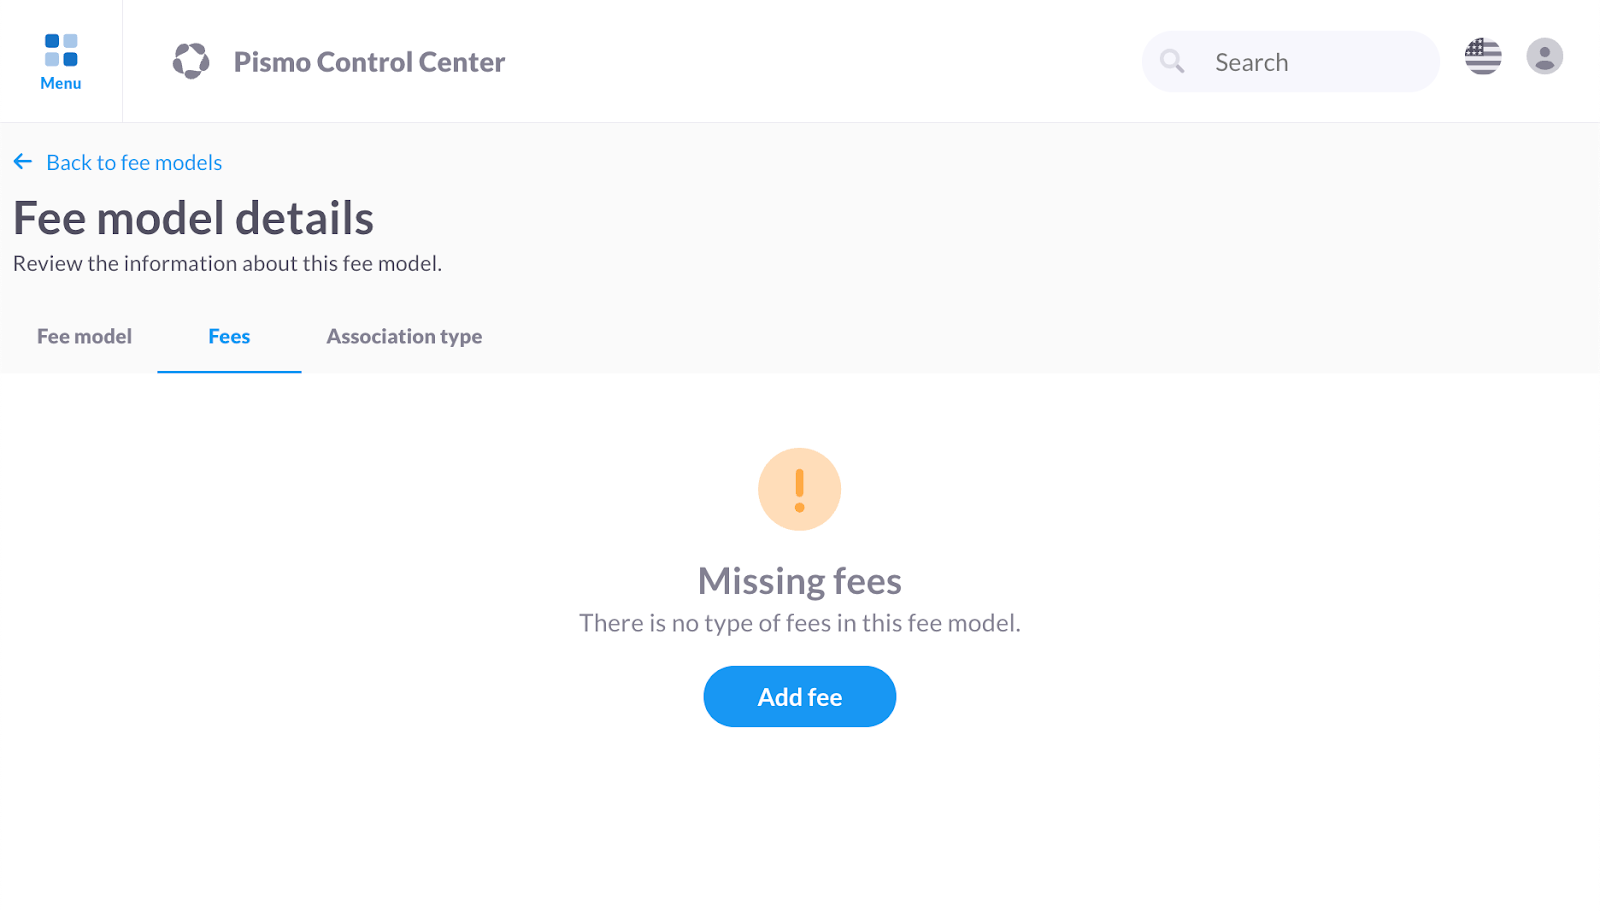
- On the Fee model details screen, click the Fees tab.
- On the Fees tab, click Add fee.
- On the Fee description screen, type a name for the fee in the Name field.
- Select one of the following to specify whether the fee generates a transaction:
- Yes, it generates a transaction
- No, it does not generate a transaction
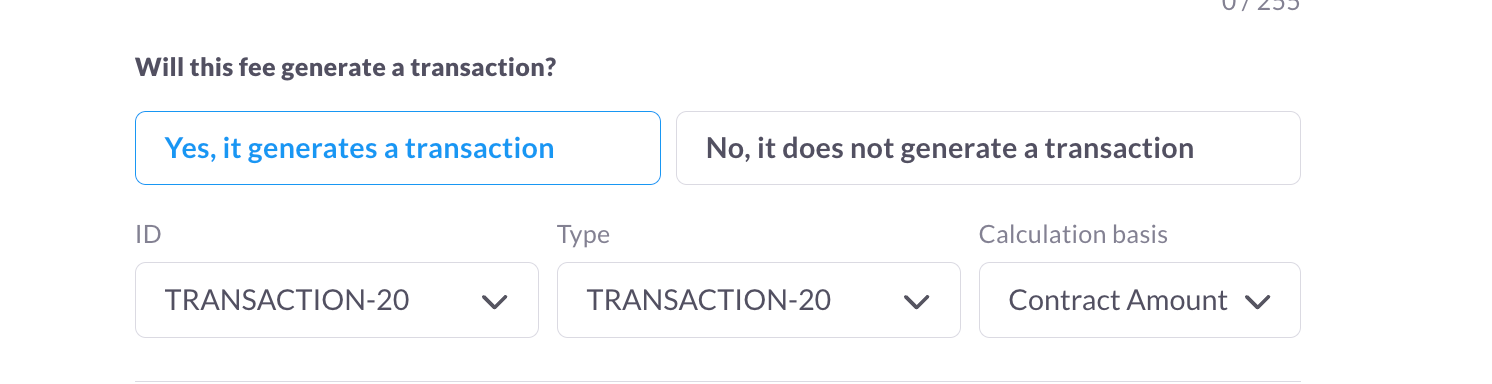
- If the fee does generate a transaction, do the following:
- In the ID and Type fields, select the transaction ID to be used.
- In the Calculation basis field, select one of the following:
- Principal amount: Taxes are applied to the original transaction amount only. This is the default.
- Contract amount: Taxes are applied to the original transaction amount plus fees.
- Select one of the following to specify the calculation method:
- Fixed
- Greater
- Percentage
- Daily percentage
- Compound interest
- Accumulator
- Price table
- Aging
- IOF
For more information about calculation methods, see Fee models.
- Click Next.
- On the Processing code screen, click the Select button for each processing code to apply the fee to. (Processing codes identify an operation, such as purchases or debits.)
- Click Next.
- On the Review screen, click Finish.
Edit or delete a fee
You can delete the fees in a fee model, but not the model itself.
To edit or delete a fee:
- On the main menu, click Setup > Fee models.
- On the Fee Model Details screen, click the Feestab.
- Click the fee you want to add or delete.

- On the Fee details screen, do one of the following:
- To edit a fee, click Edit and then follow the steps described above in Add a fee model.
- To delete a fee, click the Delete fee button and then click Yes in the confirmation dialog.
Attach a fee model to an organization
Every organization on the platform is attached to a default fee model. This model is used whenever a platform operation requires a fee model but none is attached at the account or program level.
You can't use Control Center to attach a fee models to accounts. Do do this, use the endpoint Attach fee model to account.
To attach a fee model to an organization:
- On the main menu, click Setup > Fee models.
- Click the fee model you want to attach.
- On the Fee Model Details screen, click the Association type tab.
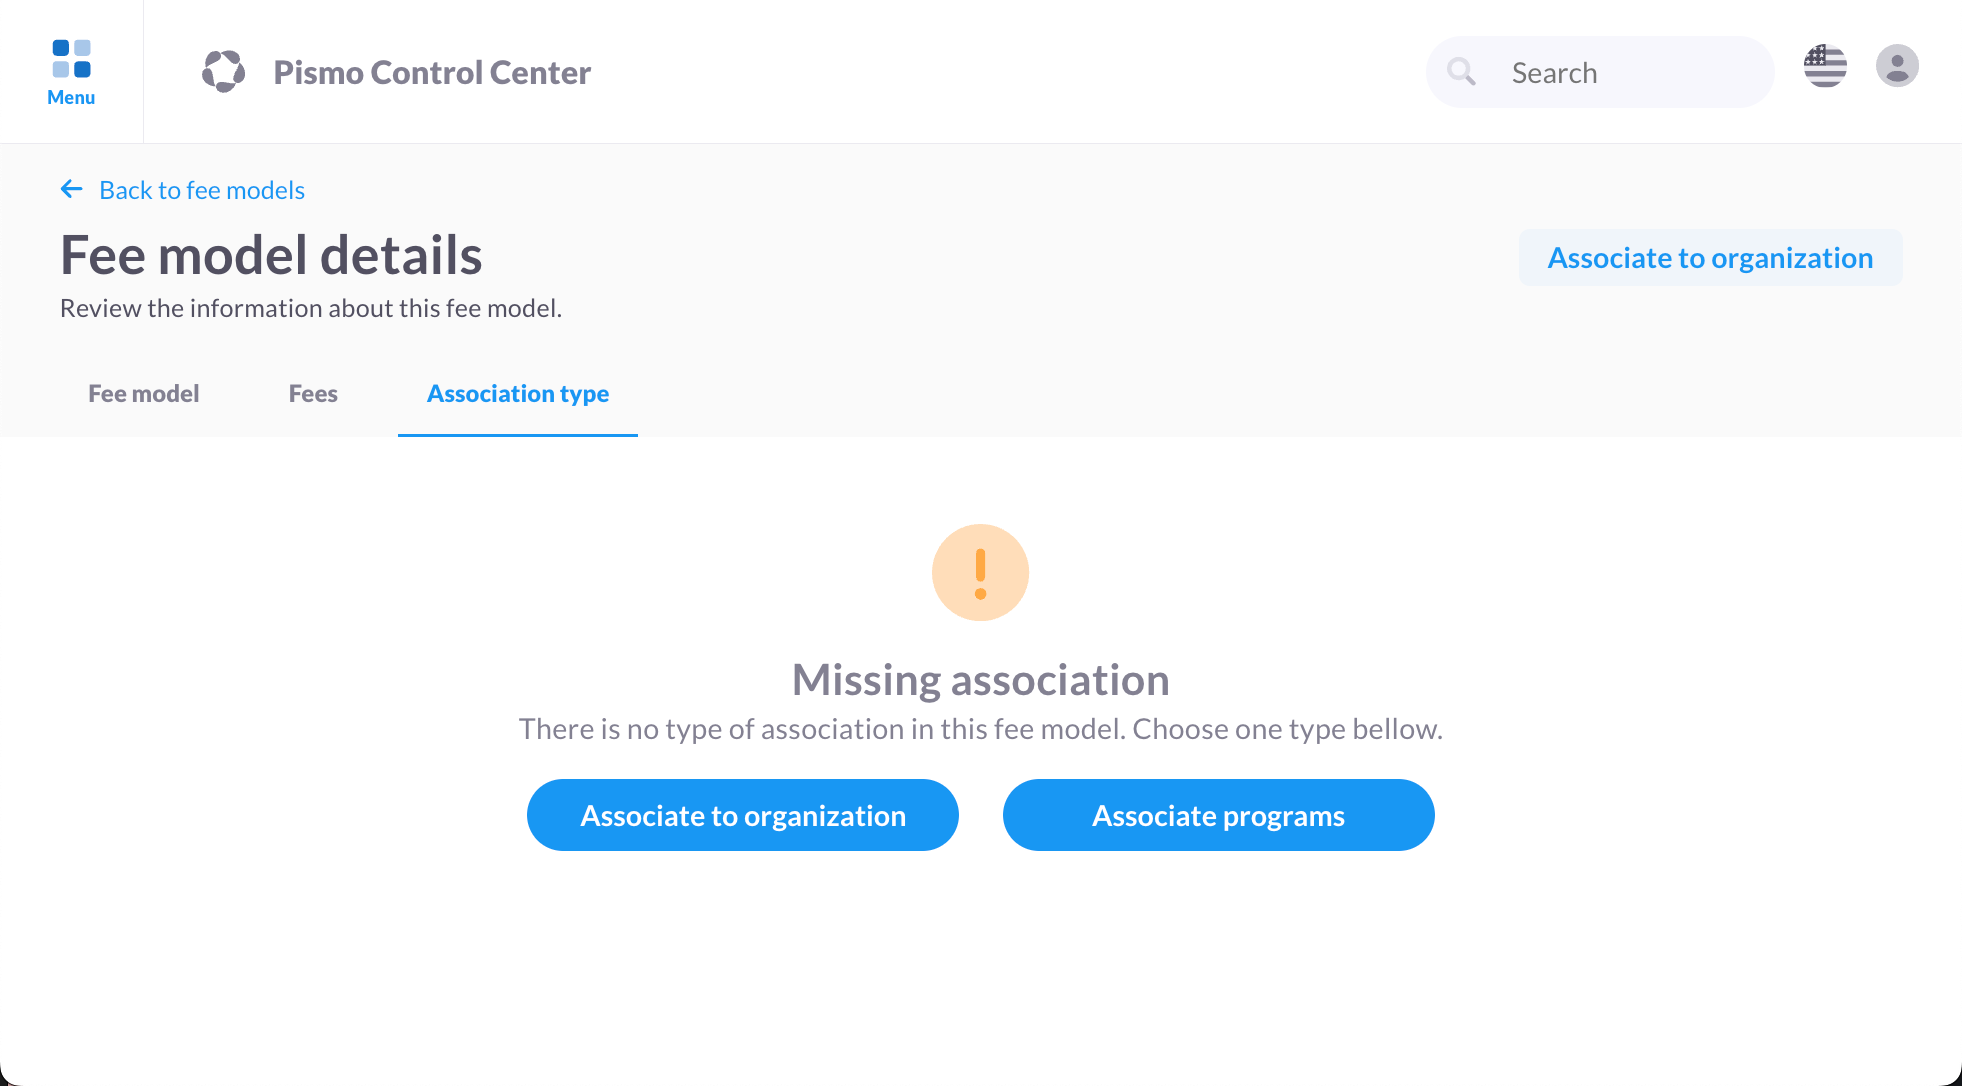
- Click Associate to organization.
- In the confirmation dialog, click Yes.
- Click Next.
- On the Review screen, click Finish.
Attach a fee model to a program
You can attach fee model to multiple programs at a time.
You can't use Control Center to attach a fee models to accounts. Do do this, use the endpoint Attach fee model to account.
To attach a fee model to an organization:
- On the main menu, click Setup > Fee models.
- Click the fee model you want to attach.
- On the Fee Model Details screen, click the Association typetab.
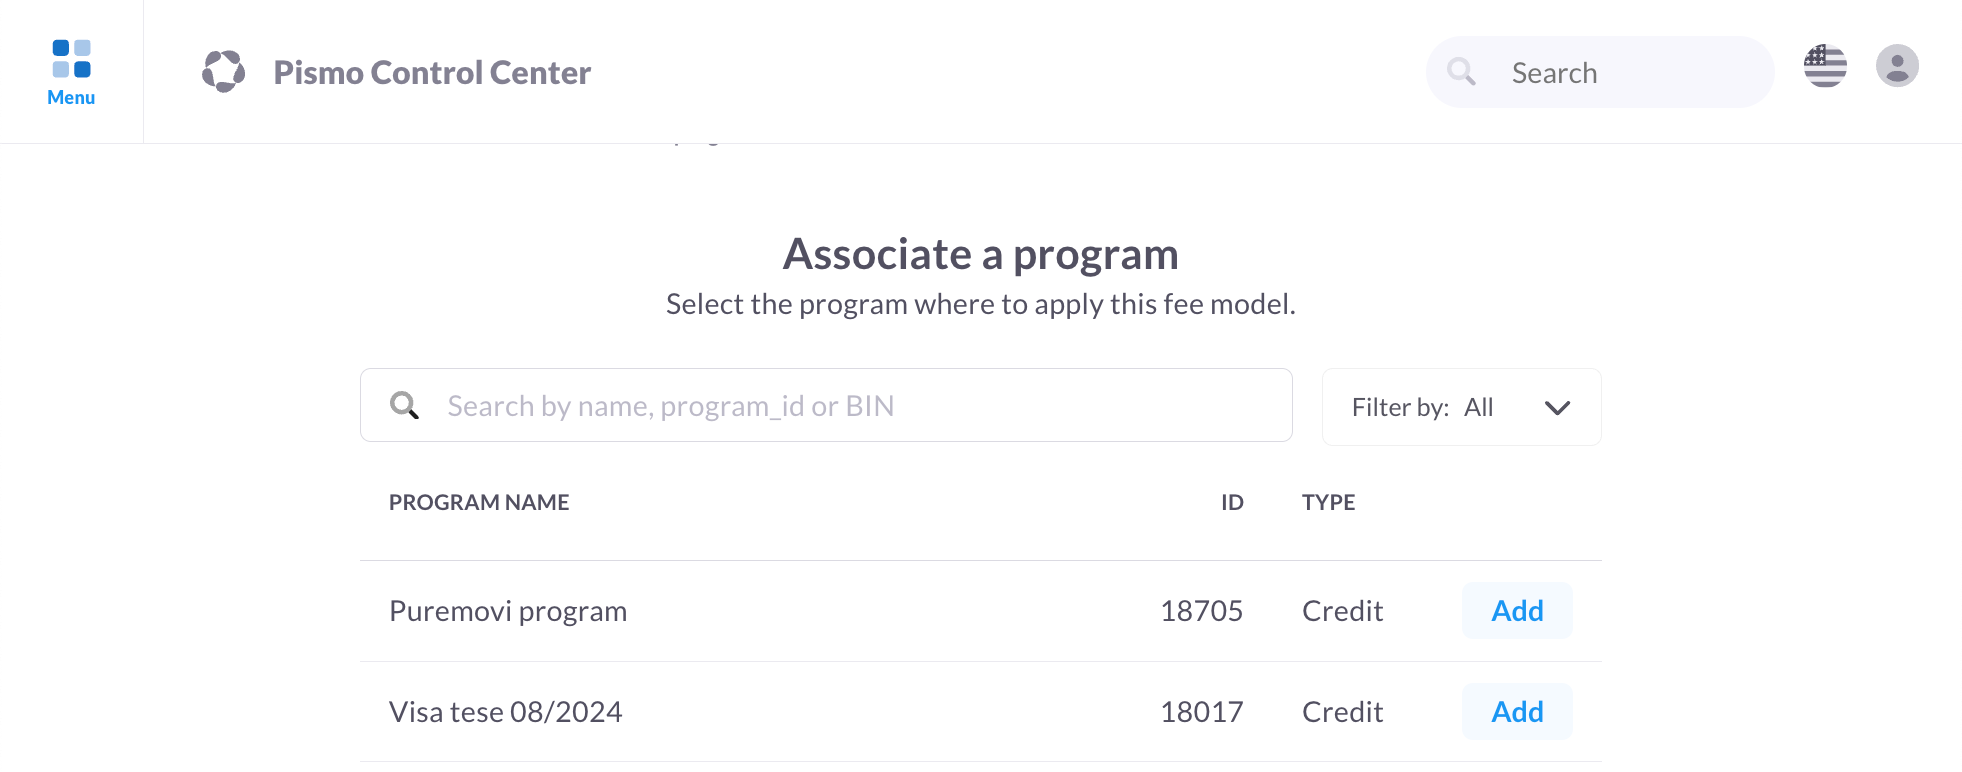
- Click Associate programs.
- On the Associate a program, screen, for each program that you want to attach, click its Add button.
- Click Next.
- On the Review screen, click Finish.
Updated 3 months ago